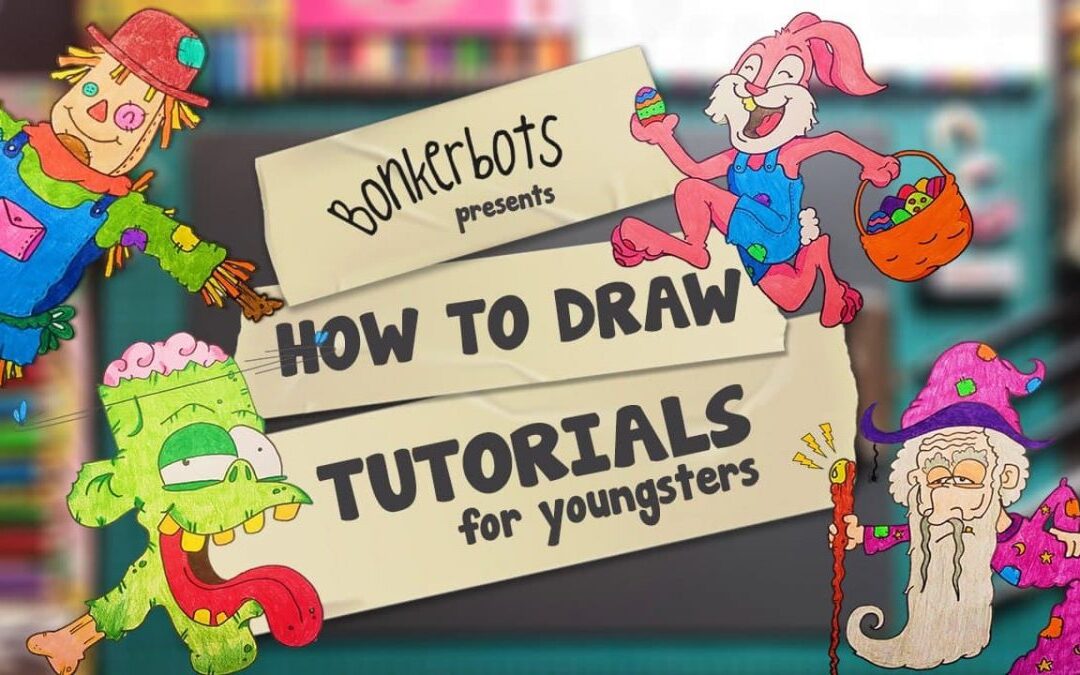
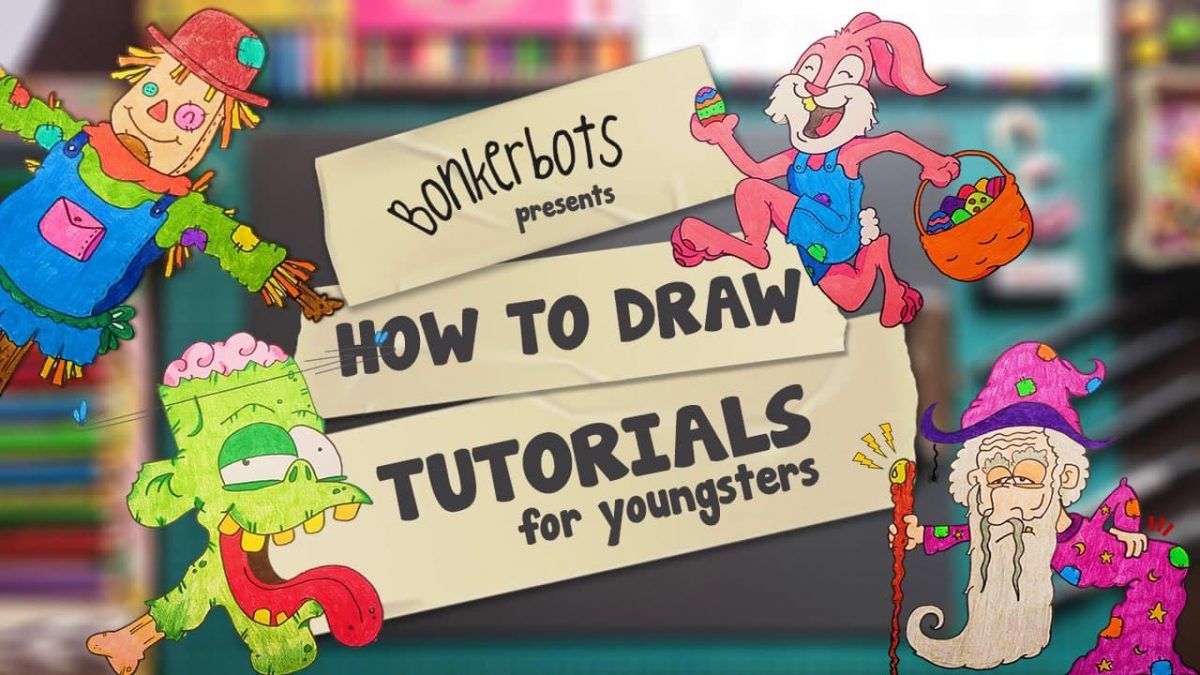
Bonkerbots on YouTube. Wow! We never thought we would end up having a Youtube channel. Granted we’re still bran new and have a teeny tiny following but that was never the reason for us creating one. As you know, Keith has this pretty awesome gift of being a rather talented artist. I’ll request an image and minutes later he has created one that’s way better than what I had originally described. I love his gift and wish that I could even begin to draw a tiny bit like him. Yes, yes we all have our talents and mine lie else where, which is how we landed up creating our channel.
I mentioned “You should start doing some tutorials” and TA DA! It has been absolutely wonderful creating these videos. As a teacher, I have always enjoyed doing directed drawings with my students and not just for Kindergarten but for all ages. One thing can be said for all of them and it’s that they LOVE IT! It cannot be said enough but Art is insanely important. From my experience teaching in Thailand and Cambodia, the Arts aren’t seen as important. There is a ton of focus on your core subjects and that’s totally fine. Whether I’m planning my own lessons or subbing, I’ll always throw in some Art. It’s quite funny though because I’ve created a little bit of a reputation by walking in a sub class and the kids will go, “Yay, we’re doing Art today! 🙂 ) so naturally, I cannot disappoint their sweet faces.
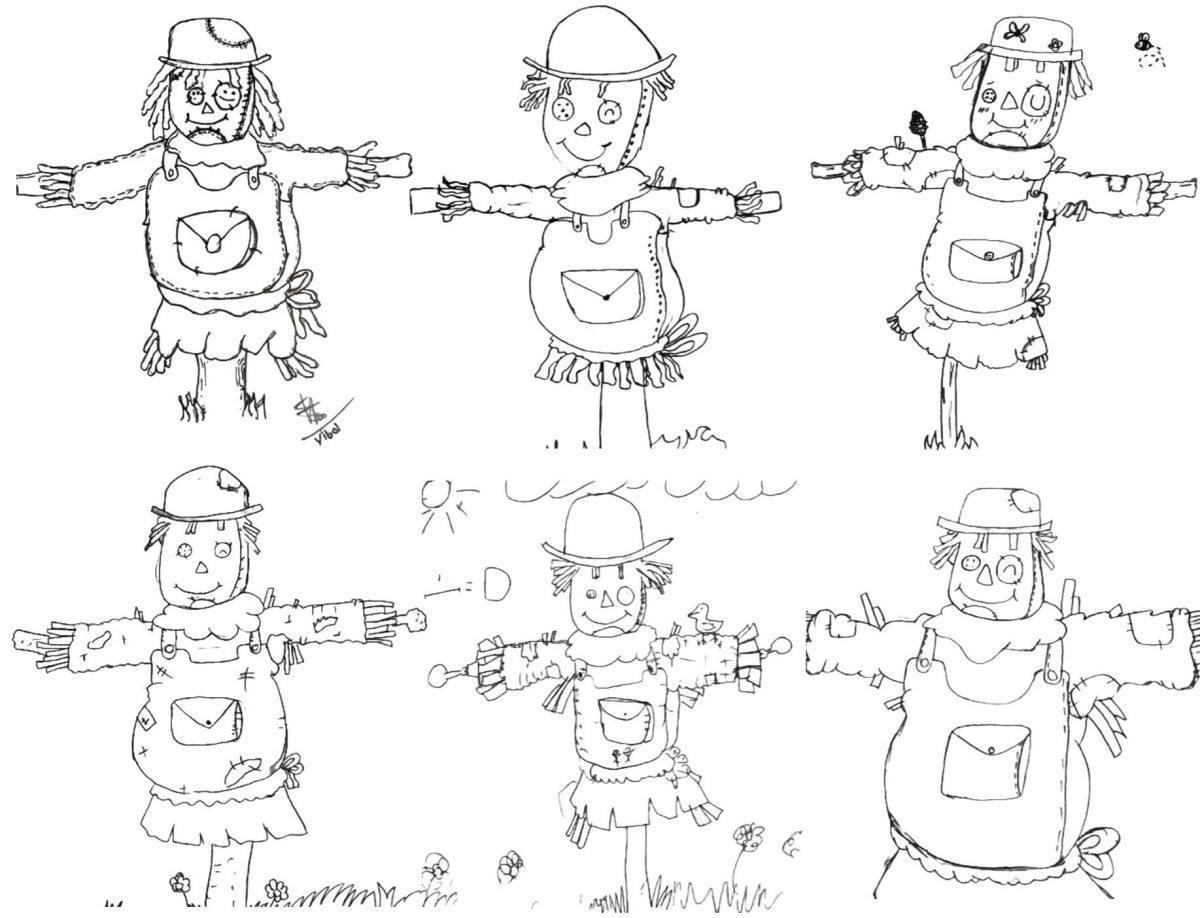
Some Scarecrows drawn by my Grade 6 students.
Our channel is designed to help young students better develop their drawing, creativity and line work accuracy. The videos can be done by young students or even adults. I have followed all of the tutorials and have really enjoyed doing them. There’s a sense of pride that happens once completing your drawing. You’re looking at it in the beginning thinking , “There’s no way I can draw that!’ or “That’s too hard!” My students have certainly said that. However, once you’ve finished drawing, you’re like Hey, I did that. 🙂 I actually find them rather relaxing too.
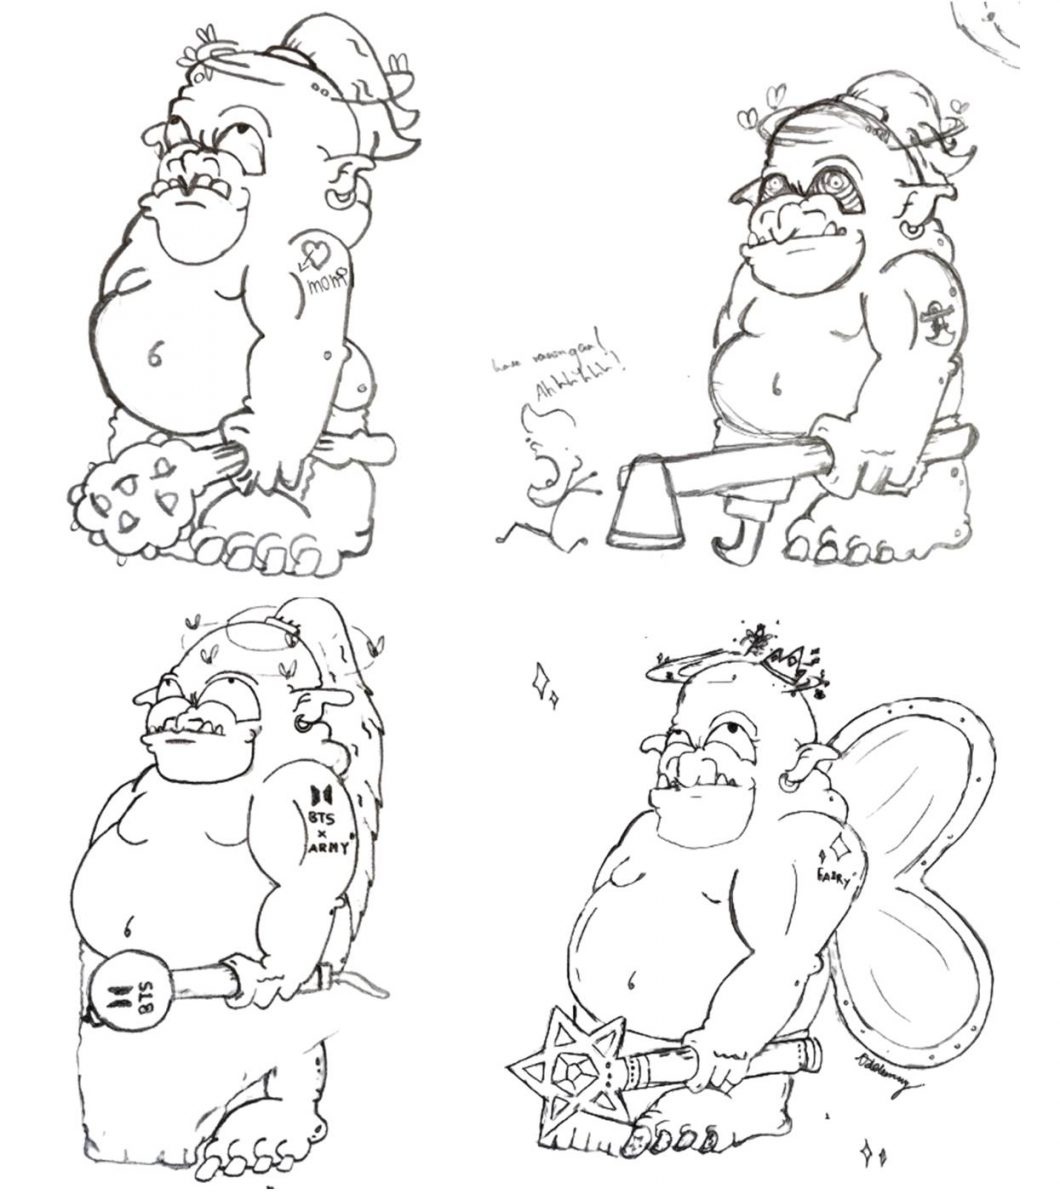
I love how my students personalized their Ogres.
There are plenty of tutorials online and so for ours, we chose to not have us speaking but rather just the text. You can play the video and pause if you need more time. It’s entirely up to you. The videos work for individuals, homeschooling or for a class fill of students. I’ve played them off a T.V and a projector, which all works perfectly.
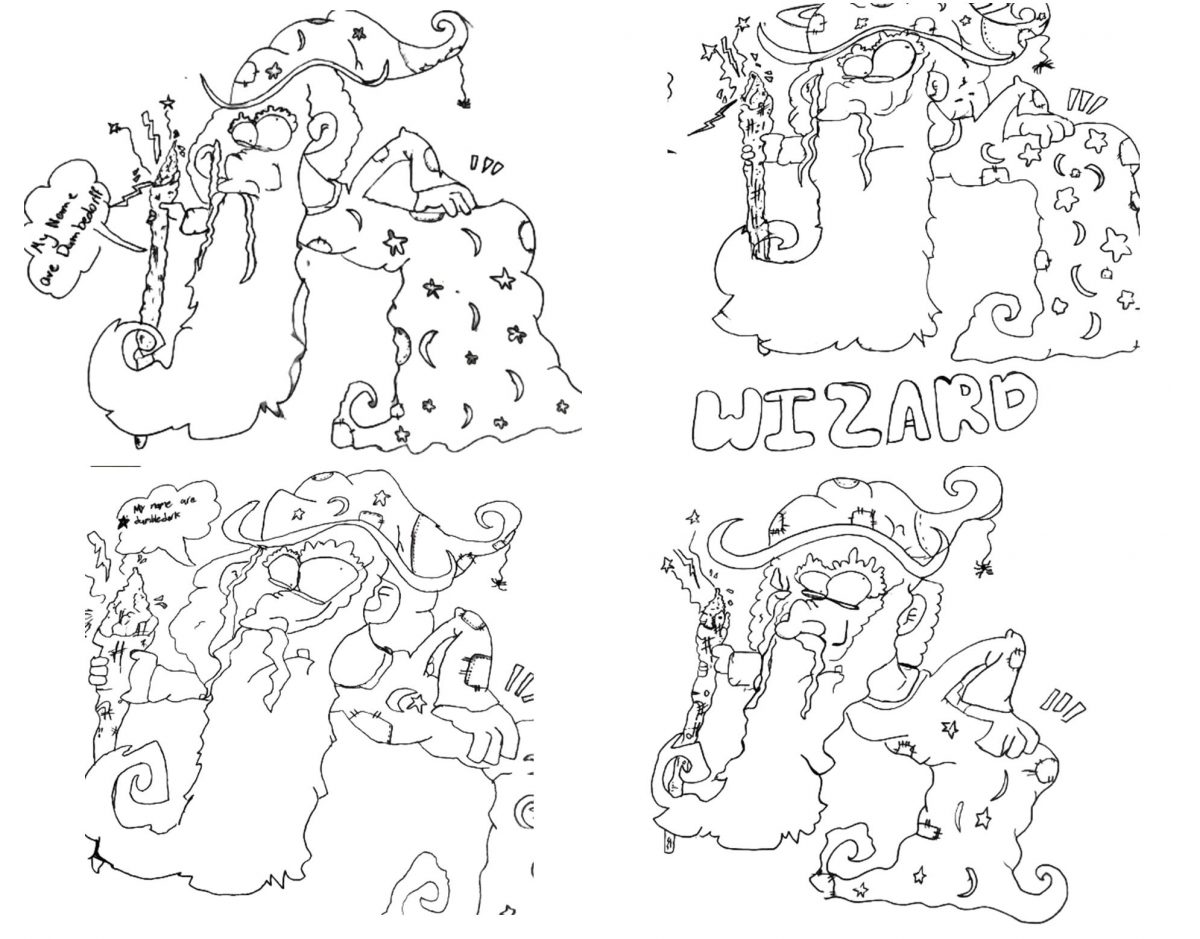
These were drawn by Keith’s students. They look amazing!
So if you’re in the mood for drawing, please check out our YouTube channel. Give our drawings a go and tag us in them, wherever you are in the world. We would LOVE to see yours. 🙂 🙂
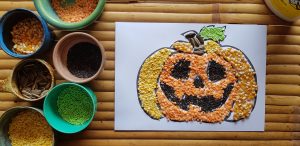
Oh my word! I ABSOLUTELY LOVE making food mosaics. I will make it work with any theme and boy, does it work. It doesn’t matter which grade I have made them with, from K- lower primary but they all ADORE it and are 100% zoned throughout. I am also always impressed with how well they follow instructions.
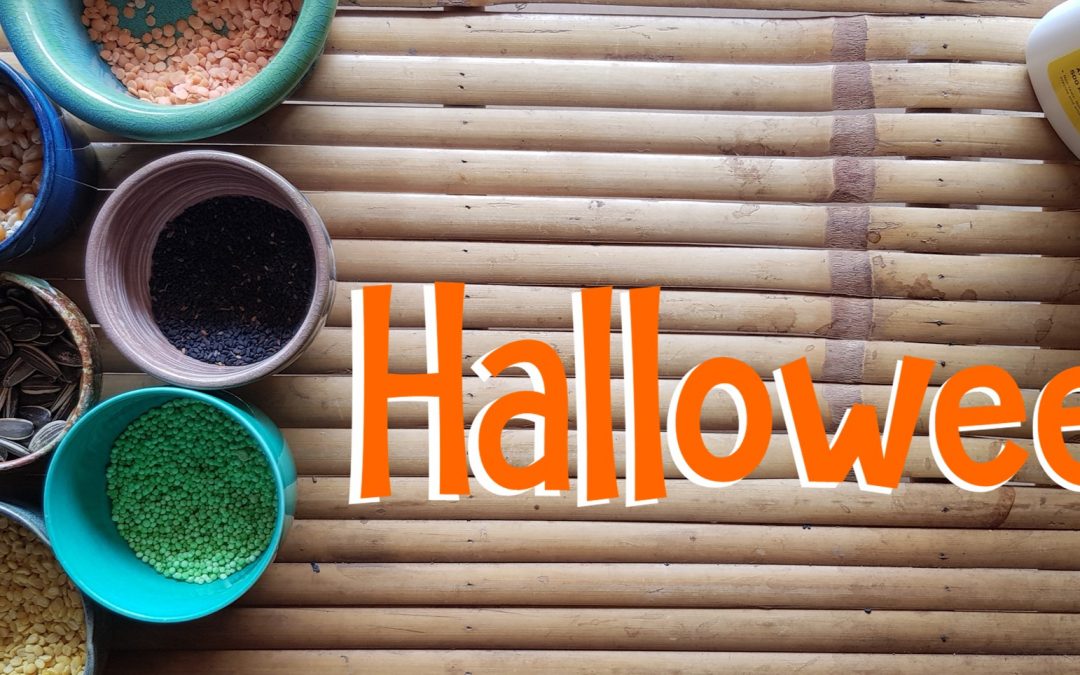
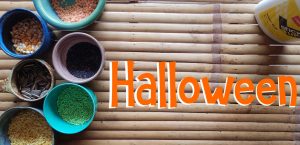
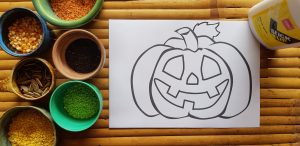
As Halloween is approaching, we will start making some really rad crafts. This year we have this cool FREEBIE for you, which you can grab at the end of the post. Be sure to check out our other Halloween Freebies too (Links at end of our post).
Doesn’t it look super duper cool?
Mosaics are really fun to make but the end result is pretty epic. The kids love working with the different textures and are super proud to show of their creation once they’re hanging up in the class.
What ya making?
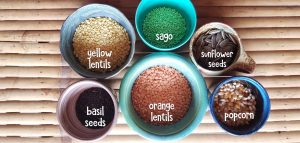
You will need:
Board (card stock)
White glue
Yellow and orange lentils
Popcorn seeds
Basil seeds
Sago (green)
Sunflower seeds
You can totally change your ingredients to whatever is available and affordable. The ingredients I used are very affordable this side and most of them cost less than $2 for each pack.
Let’s get crafting!
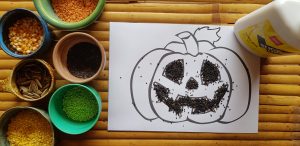
The first thing you will need to do is ensure that all ingredients are easily accessible to the kiddies. I really enjoy these trays that I found in the supermarket. They’re a perfect size and I must say, I am always impressed at how little mess there is at the end. Don’t get me wrong, there is certainly a mess but not nearly as much as one might expect.
Normally my kids would be sitting in groups and they would share trays but we’re back at school, following strict guidelines so the trays will be slightly different now. I generally have the small white glue container for each table, wonderful opportunity for the little ones to practice their squeezing (great hand workout), although I also walk around with my glue to help those who need.
We go through the rules and then work step by step making our mosaics.
Once they have glued the goodies, they are instructed to lift it up to let the excess fall down. We generally let it fall on the ground, which we will sweep up once finished. Even though we’re making the same craft, it’s always fun seeing how unique they each turn out.
We also walk through how much glue is actually needed. Teachers are well aware, there are ALWAYS one or two kiddies that feel they must use the entire bottle of glue on their masterpiece 😉 but overall, they really handle it all with ease.
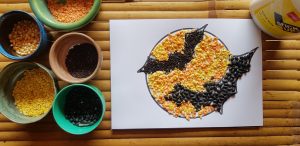
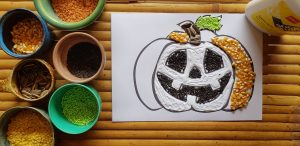
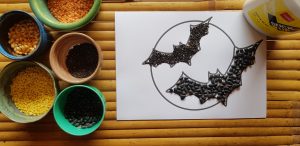
This year we have made the pumpkin template, bats flying with the moon in the background and a skull template. It’s hard to choose which one I like more as I think they turned out beautifully. I am also a sucker for making these. I find it rather relaxing;) haha 🙂 I get way too excited when doing these with the kids.
Sure…making crafts can be tiresome but it’s well worth all the prep and the pure joy in the faces while making it. 🙂
For the bats, I used basil seeds for the smaller one and black beans for the bigger one. I really like the effect it made.
Instead of only using one ingredient for the moon, I chose to mix the yellow and orange lentils and even added some popcorn seeds. Again, I am a big fan of how they turned out.
So whether you’re a parent creating this with your little one at home or a teacher making these with a class full of eager faces, I hope you have a wonderful time. I would also love to see how they turned out and which ingredients you used. 🙂
One of my favorite parts of teaching young learners, is looking for and creating resources for developing their fine motor skills. Once again, my dear friend Pinterest comes to my aid with an insane amount of ideas. Some of the ideas take a lot of prep and others use everyday items to create these engaging activities. Today’s post is a break down of some of the activities we use in our school. As you may have noticed, I have titled this post, Part 1 as there are just far too many ideas for 1 post and I shall definitely share some more later on 😉
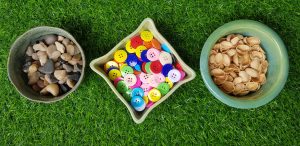
Buttons, stones, pistachios?
This activity requires very little prep. All you need is:
Colored paper
Marker (sharpie)
Little stones / pebbles
Colored buttons
Pistachios / Sunflower seeds
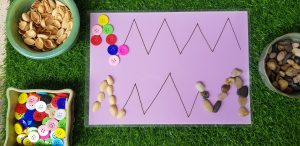
All you need to do is draw different lines / waves / squiggles onto your paper, laminate or insert into a plastic folder and then choose which medium you want to use and you’re good to go.
We love alternating ours so sometimes we use the little stones or our buttons. You now have an excuse to eat countless amounts of pistachios. ‘It’s for work, honey!’ haha. Why not use sunflower seeds, watermelon seeds, pom poms and the list goes on.
The kiddies are 100% zoned throughout this activity and once they have completed the page, they are thrilled to present it to you. What’s not to love about it?
Letter formation
You will need:
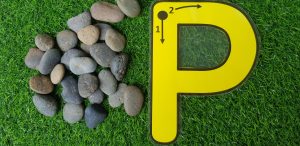
stones / pebbles (larger ones)
letter cut outs / numbers (whatever you would like them to ‘trace’.)
grass mats (great visual and sensory effect)
This activity can be adapted countless ways. I really enjoy using the larger stones that I purchased at a nursery for around $5. This was also a score as it has been quite challenging finding things around my little town. However, Siem Reap has developed tremendously in recent years and one bonus is having access to all these delightful goodies.
I also love doing this activity on top of the grass mats, it looks really cool and offers another cool texture for the kiddies to experience. I really enjoy using the letters to practice formation and it’s always a hit.
These blue stones, as seen below, were a fabulous little find and come in super handy. Many teachers ask if they should be worried about using these smaller materials. Obviously I don’t just hand the stuff out and let them run wild with it all. I also always use these during controlled stations / centers. That way I can keep a watchful eye. We also walk through all the rules before completing the activity. I haven’t had any problems with kiddies following, purely because I think they’re really enjoying working with different materials.
Don’t they look so pretty? 🙂
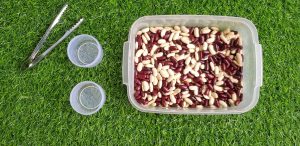
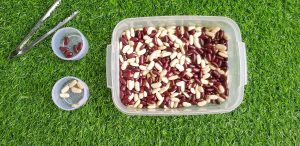
Red beans, white beans, beans everywhere!
You will need:
Beans (red or white / any 2 colored beans)
Tongs / Tweezers
Container – to store the beans
Smaller container – for students to separate the beans
Another easy activity to set up. I bought some plastic containers (tupperware) and the tongs (tweezers) from what we call here, the 2500 riel store. Basically 50 cents for majority of the items. That store has been such a haven for finding resources. A real win.
The beans came packaged from the supermarket and one pack was more than enough to fill 2 containers. The tongs were also an awesome find as some are a little tougher to use (harder to squeeze), which works out perfectly for those who are ready for more of a challenge.
Kiddies just need to use the tongs to pick up the beans and separate them into the smaller container. Looks real easy peasy but it’s not, especially if they haven’t developed their motor skills. I think this works beautifully in the classroom and at home. This activity is very adaptable. Another option would be to have kiddies practice counting and placing the correct amount of beans into an ice tray and so on.
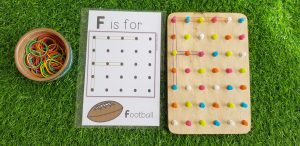
Geo boards
You will need:
Geo boards
Colored elastic bands
Alphabet / Number / Shape cards
I have the hubby to thank for these. I desperately wanted geo boards after seeing several incredible ideas online and after searching the town, DIY was the answer.
We used small chopping boards and push pins to create them. I must say they have really represented. We have had them for a long time and they are still very much in good condition. Thank you Hubs.
I like to have the kids practice forming the letters and I found these PERFECT cards in teachers pay teachers by Play to learn Preschool.
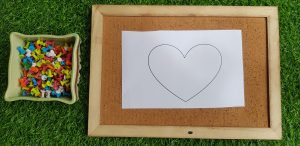
Push pins
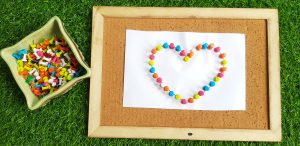
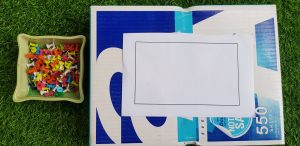
You will need:
Cork board (or card board paper lid)
Push pins
Print out
How adorable is this activity? I LOVE it! Not only is it super easy to prepare but it’s also really engaging, plus time consuming if Mom needs a little quiet time at home 😉
Simply print out an image / letter / number that the little one is going to copy, grab some push pins and a cork board (I have also used the lid of the container that paper comes in and that works amazingly) and let little one have a blast.
This isn’t just fun for the little ones, I’ve seen our teachers and TA’s quite happy doing this. 🙂 🙂
If you’re unable to get hold of the cork boards, then no stress! Grab some paper box lids, no need to make them pretty although you could paint / spray them if you must. 😉 They actually work really well and it certainly puts them to good use. We collect them very quickly with all the copying that goes on.
Pom Poms
You will need:
Pom poms
Printable
Tweezers / Tongs
The last activity for today has to include pom poms. I had to bring these up as I have waited patiently to find these. I know that back home (South Africa), these are super easy to find but I finally got hold of some and this is a snippet of what we get up to.
I found this Pom Pom Alphabet set online, created by the Measured Mom. If you’re new to teaching or have your little one at home, then you should swing by her site. She has a ton of resources available.
That’s all for today folks 🙂 I’d love to hear which activities you enjoy doing with your little ones.
 For the bats, I used basil seeds for the smaller one and black beans for the bigger one. I really like the effect it made.