As Kinder teachers, we understand the importance of helping our students develop their fine motor skills. We’re constantly searching for new and exciting ideas to use in our classrooms. Pinterest certainly aids this and can become rather addictive. It can also become overwhelming at times, seeing all the amazing ideas that other teachers and parents are doing with their kids. Some are extremely clever, reusing materials that can be found around the house and others can end up being quite pricey. Regardless, they all help in developing motor skills.
Today I’m sharing the activities we used during our stations this week. These were all budget friendly as it consists of goodies that we already had and what we didn’t have was easy and affordable to get.
Let’s dive straight in.
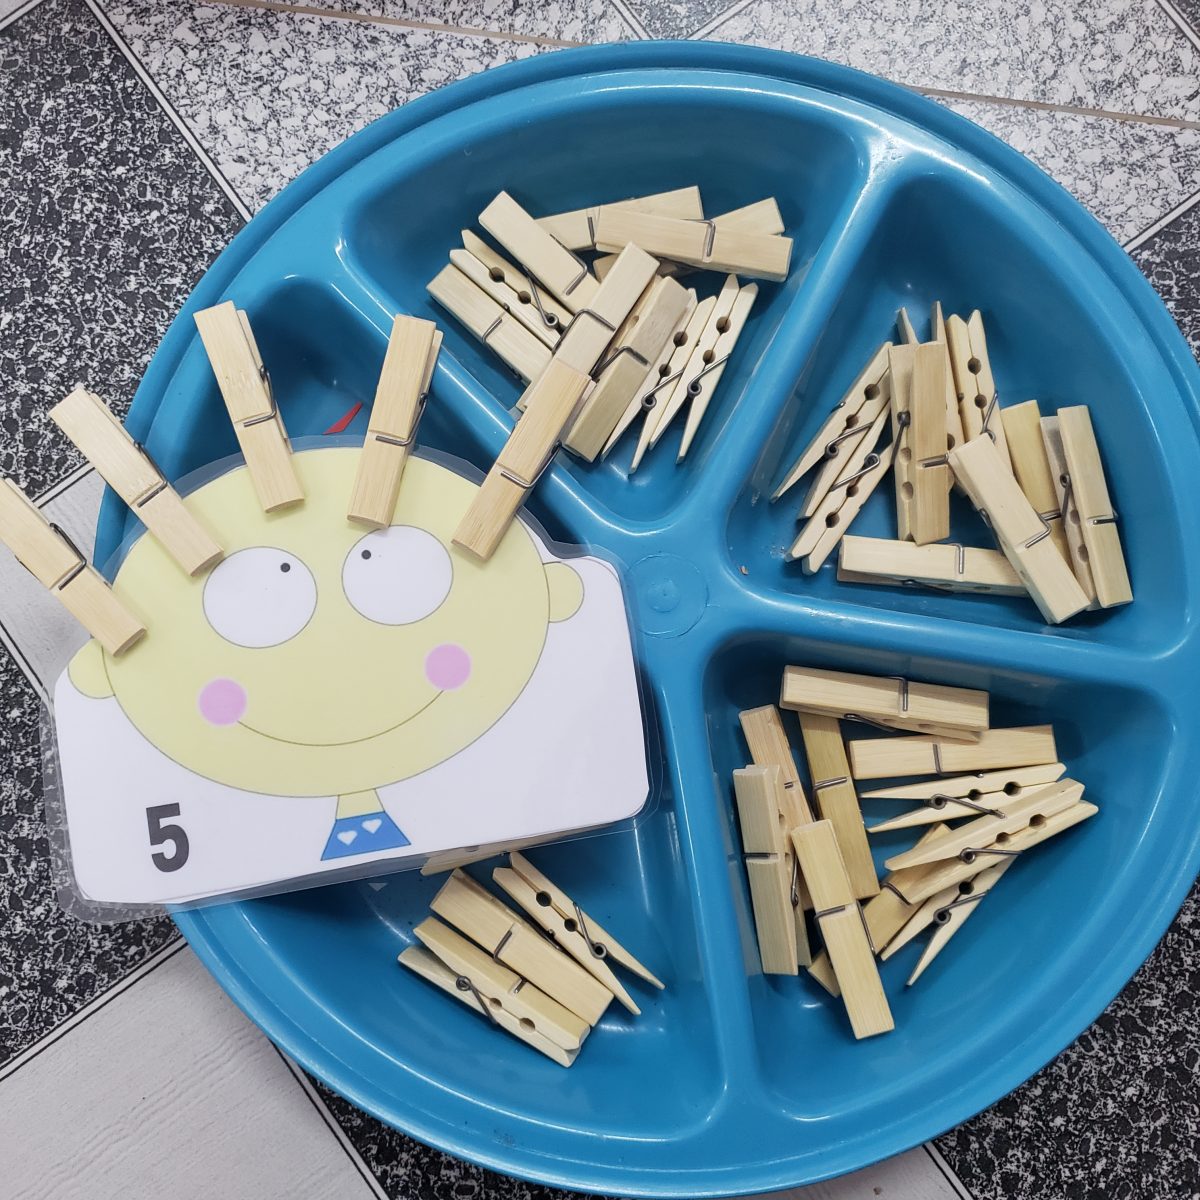
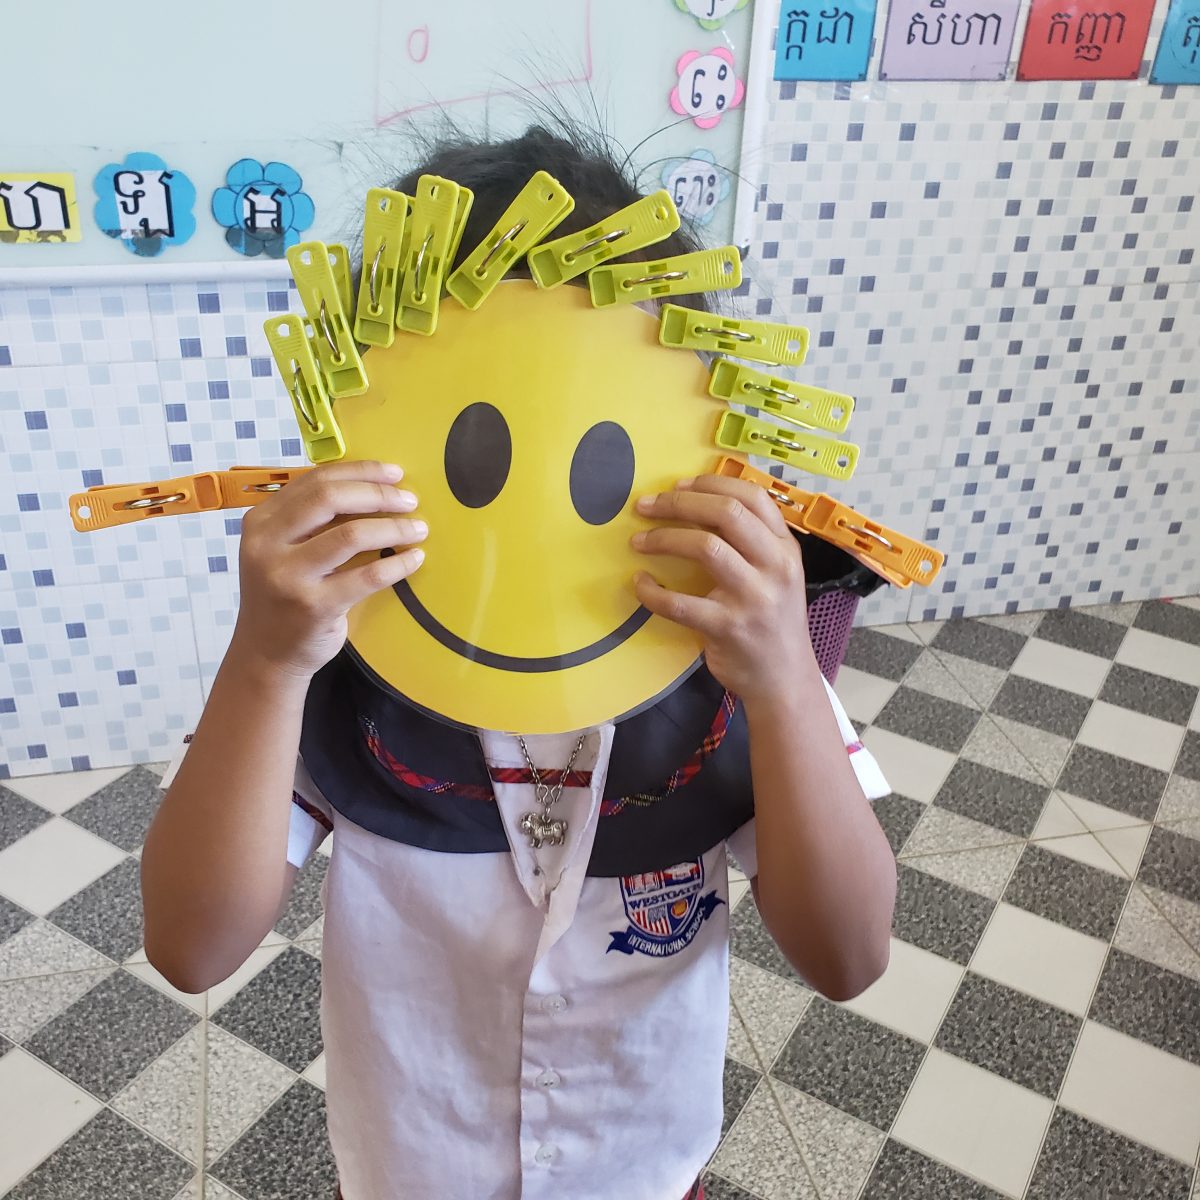
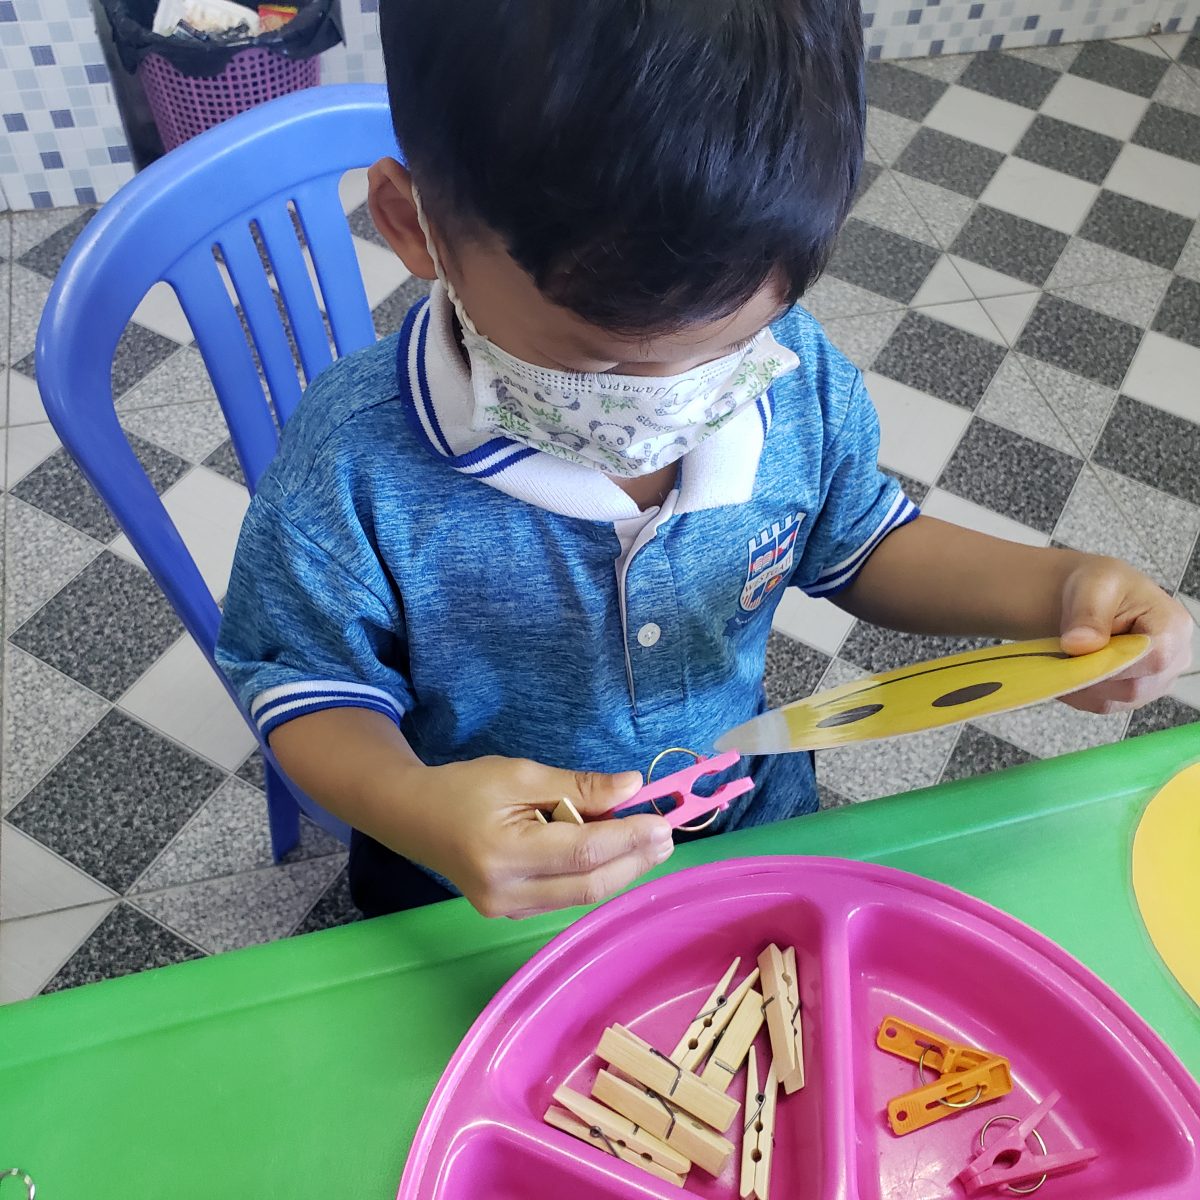
Peg hair
I was super chuffed to find these wooden pegs for next to nothing. They are normally quite pricey in Cambodia, or they certainly used to be, so that was quite a score. I bought a mixture of pegs, which the little ones all handled with ease.
Pegs can be used in so many ways, but for today I just wanted them to practice clipping them onto the happy faces and I included the counting cards because why not? Unfortunately I cannot find the link to the site I downloaded the pics from but it is easy to make your own.
They were so excited to present their happy faces. Kids are great aren’t they? 🙂
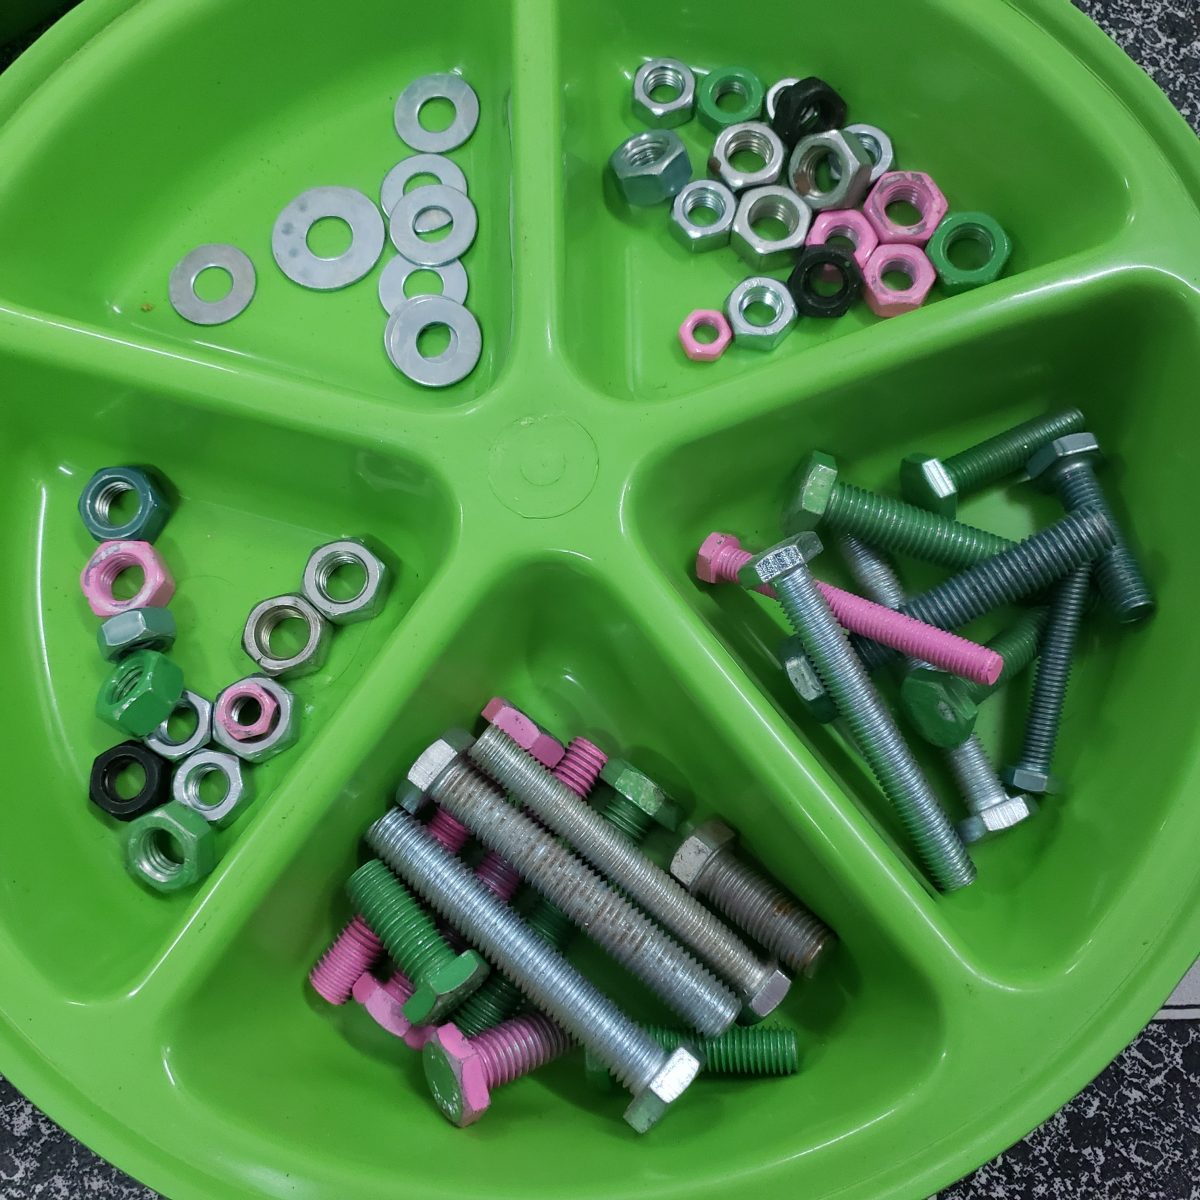
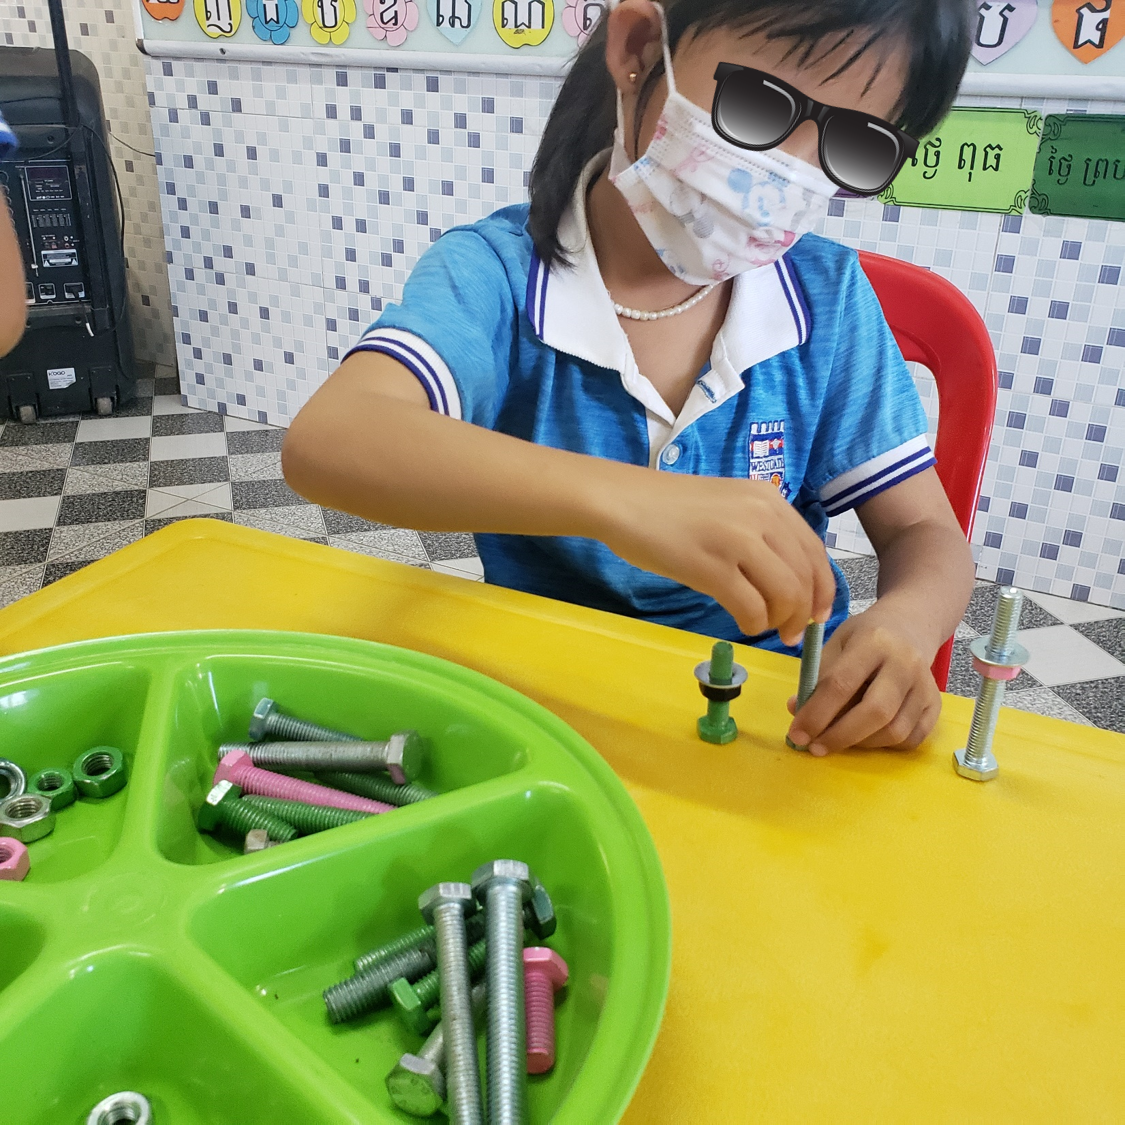
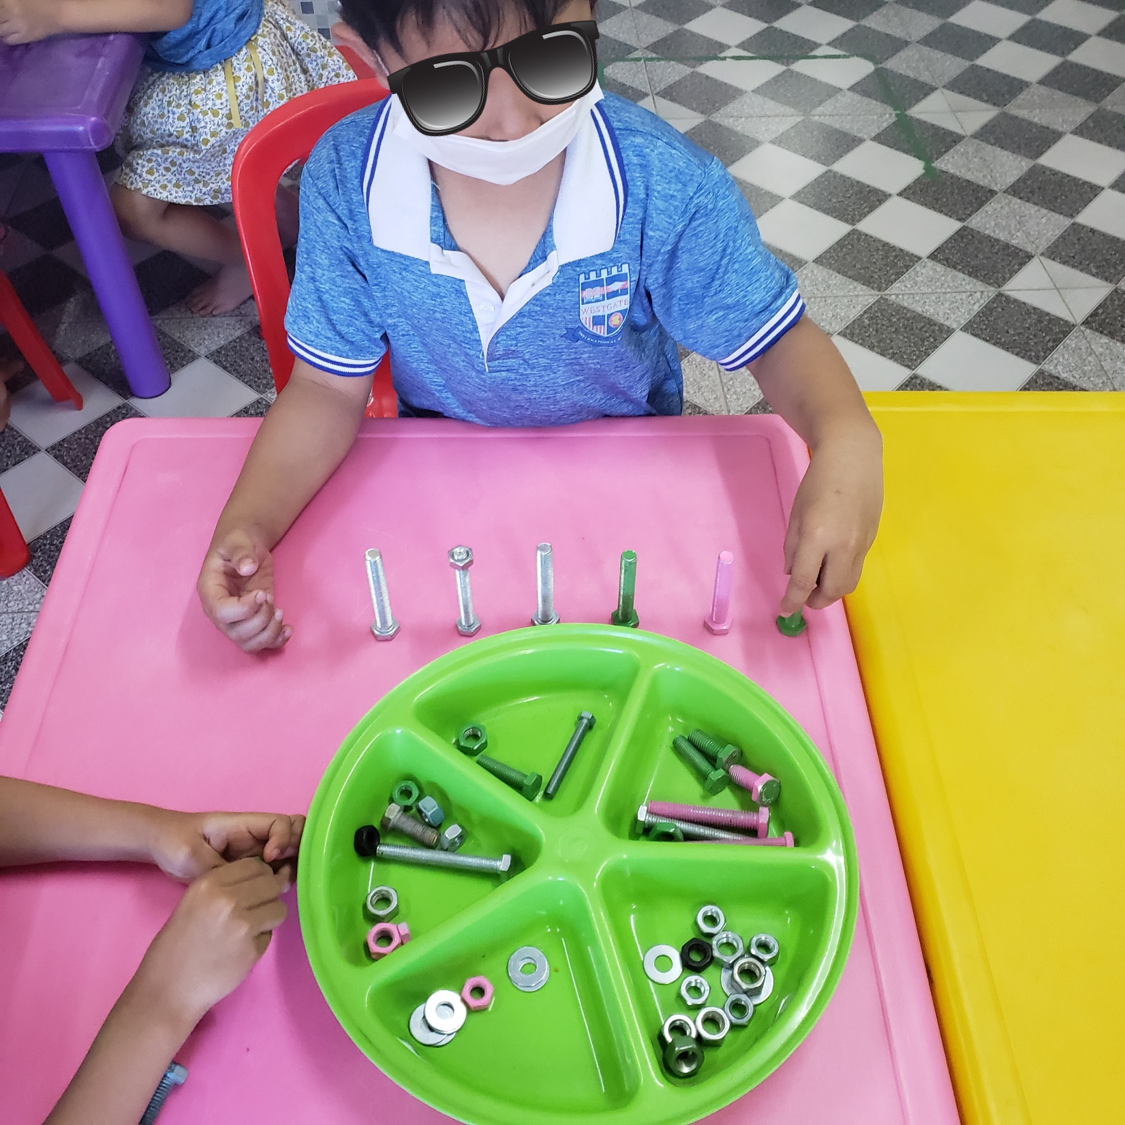
Nuts and bolts
Now this may be because I recently made the chess set but this is something I have wanted to do with the kids for a long time but just never got round to it. Finally I popped on over to the hardware store AGAIN and purchased some nuts, bolts and washers. I sprayed some green and pink to add some variety and that was all the prep needed.
They all thoroughly enjoyed this activity, girls and boys had a whirl of a time.
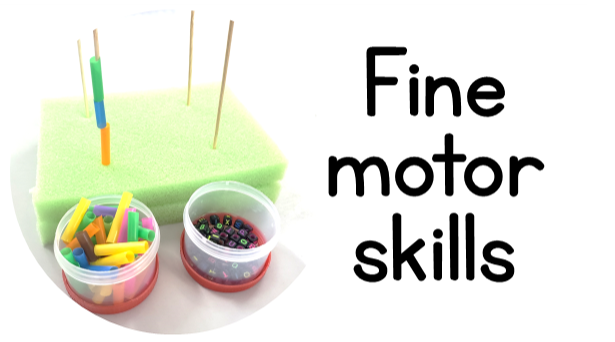
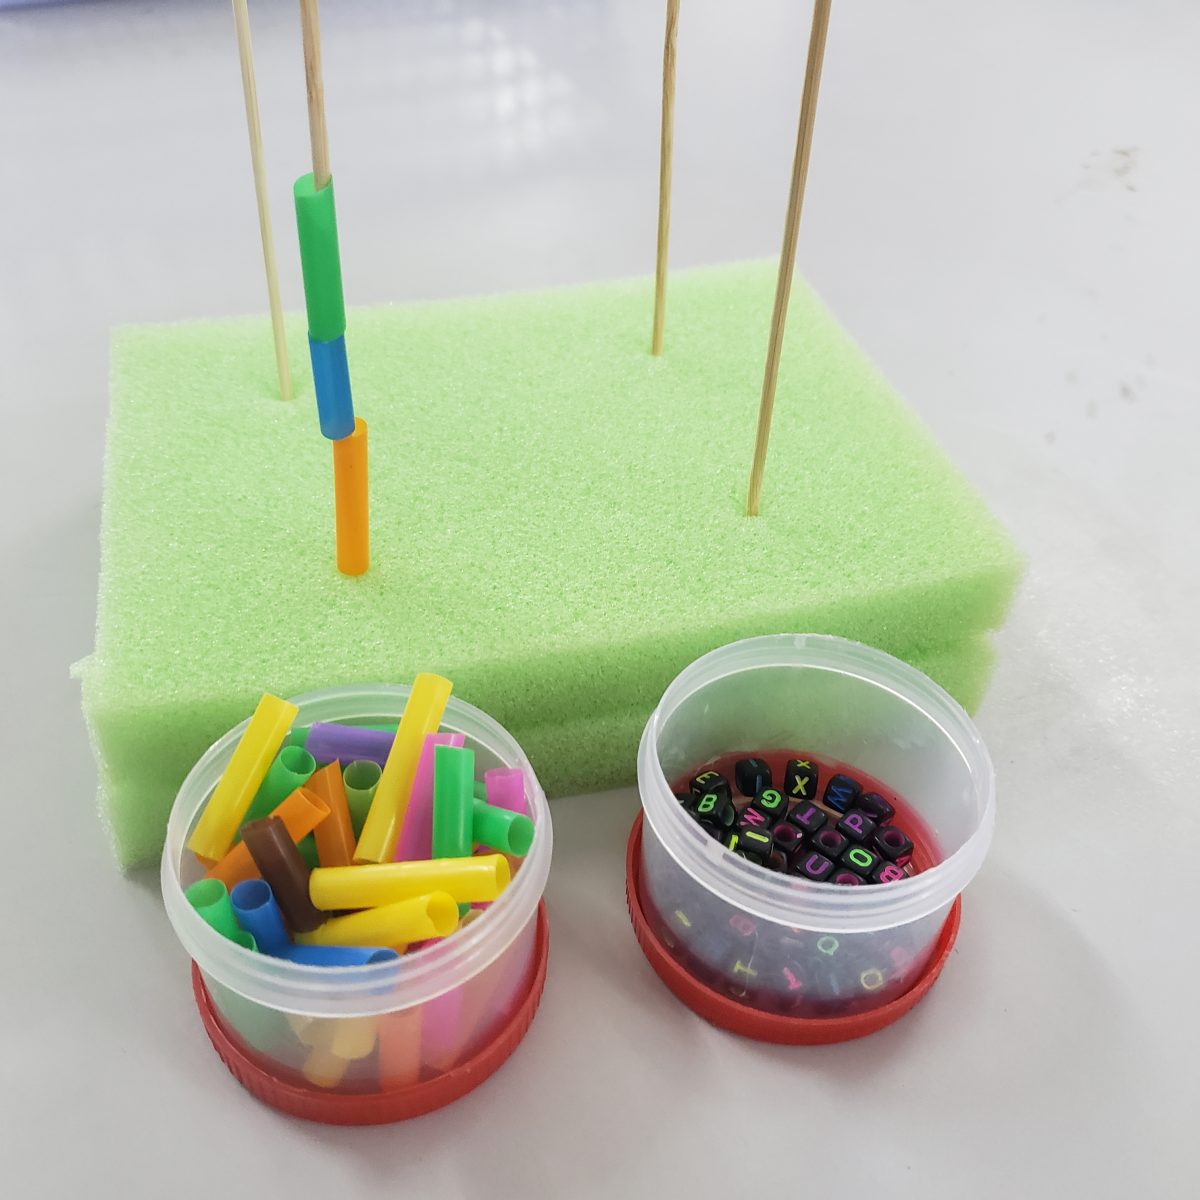
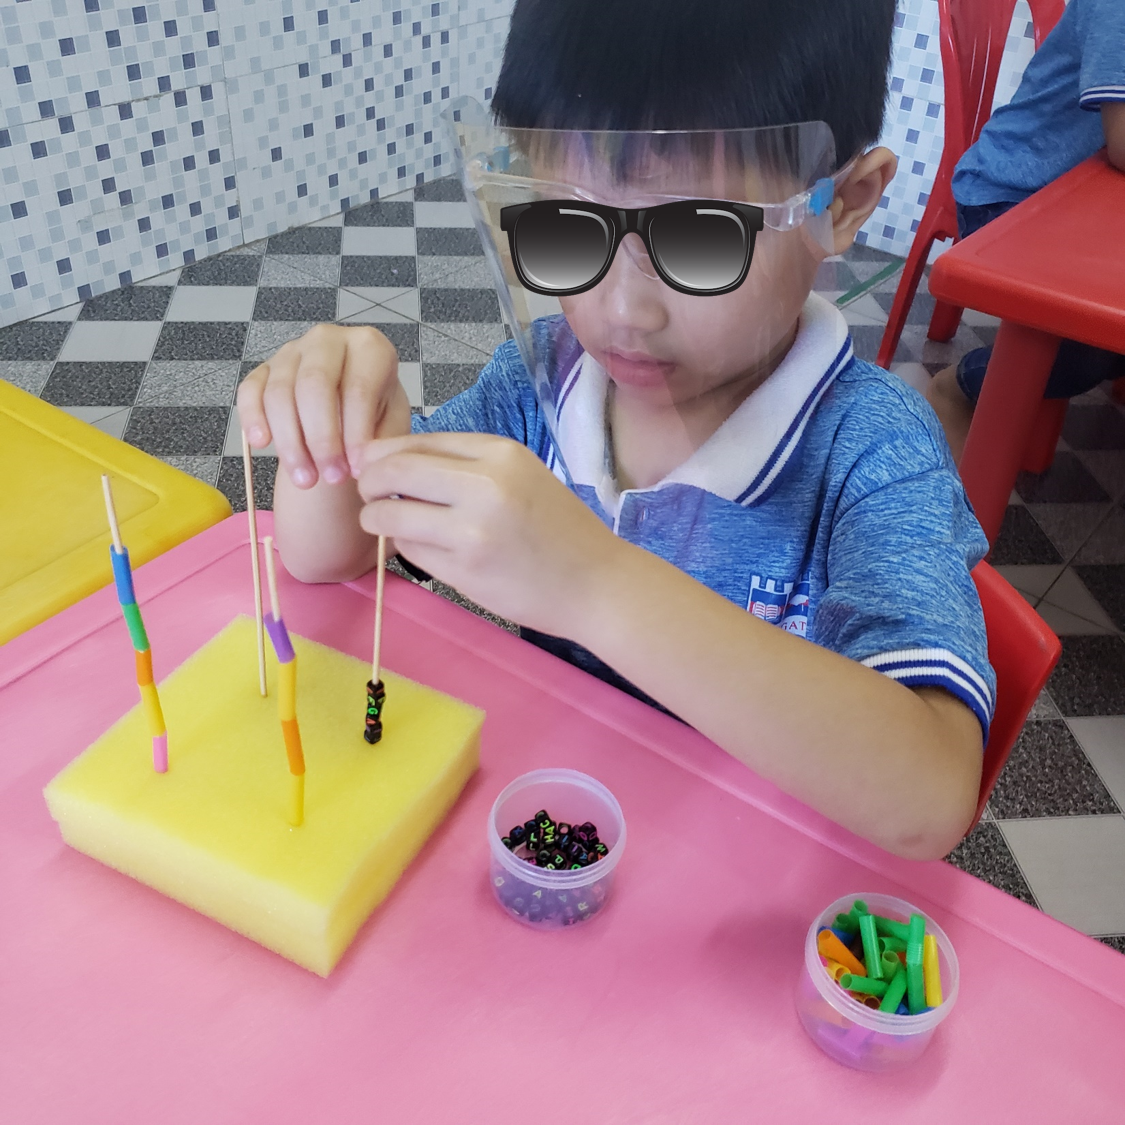
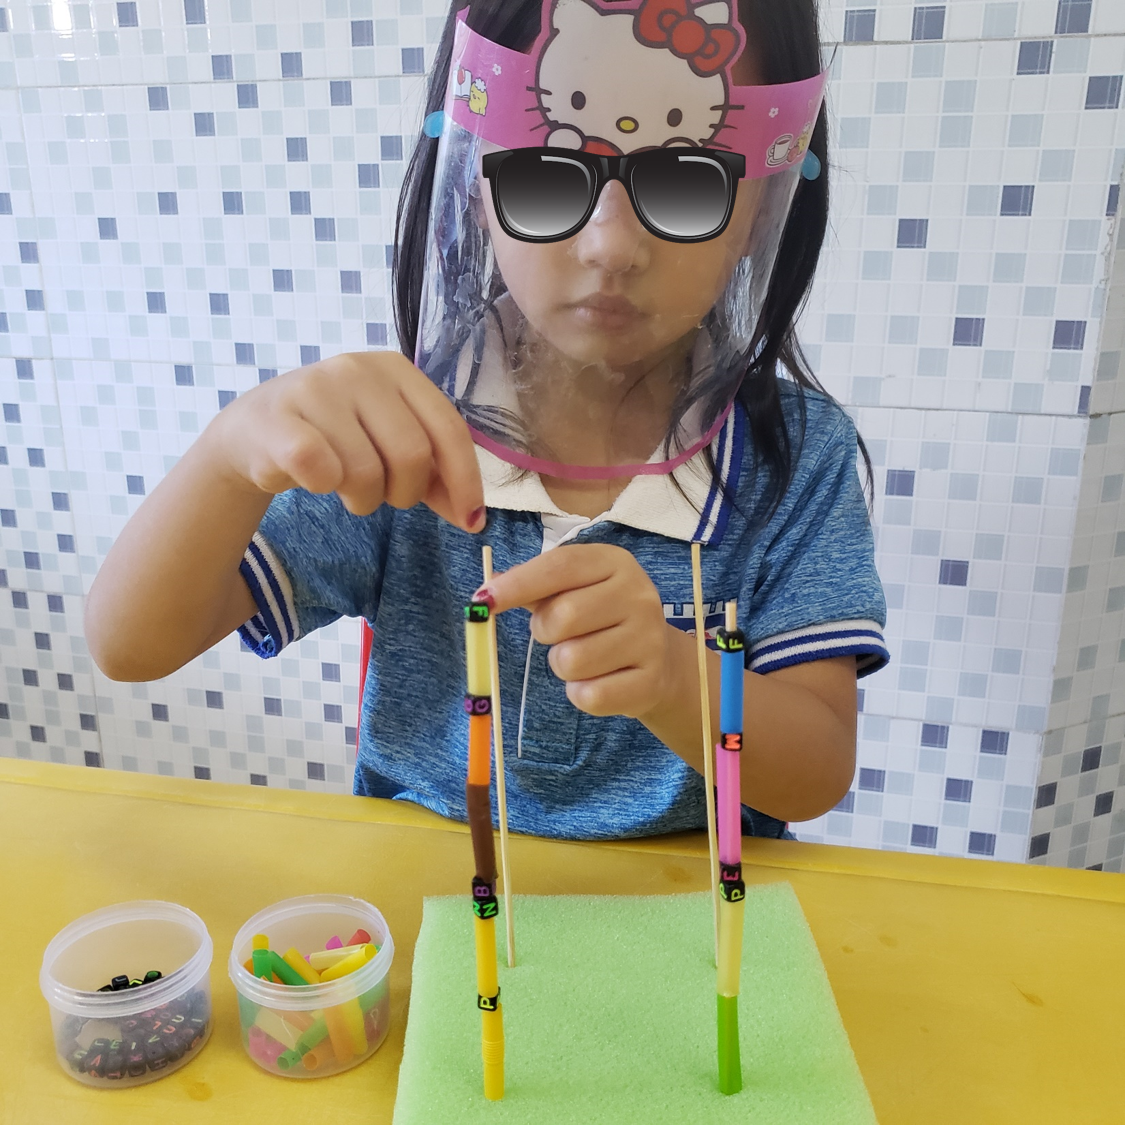
Beads, sticks and sponges?
This is another easy activity to put together and super affordable. The sponges cost less than 50c, which I cut in half. The sticks were also 50c for a pack of 100 and I used straws and small beads to make it more challenging for early finishers, and that’s it.
I simply placed two pieces of sponge on top of each other, pushed four sticks through, arranged some straws and beads in little containers, and the station was ready for action. This was a real hit as they were completely zoned throughout. For those speedier than others, I added another stick or two and that kept them busy. What a hoot!
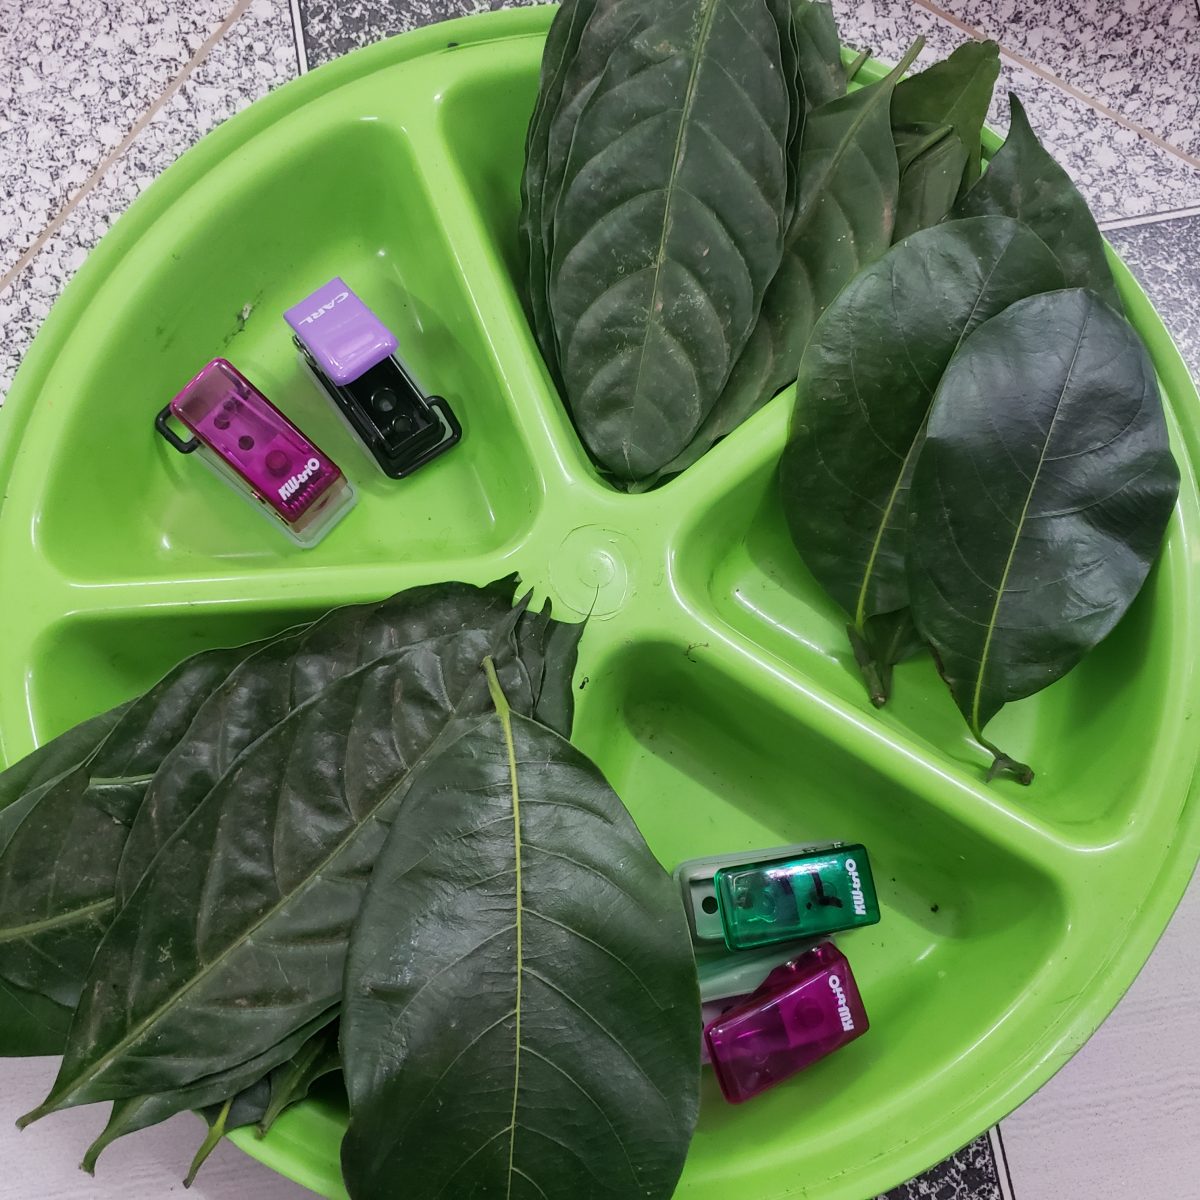
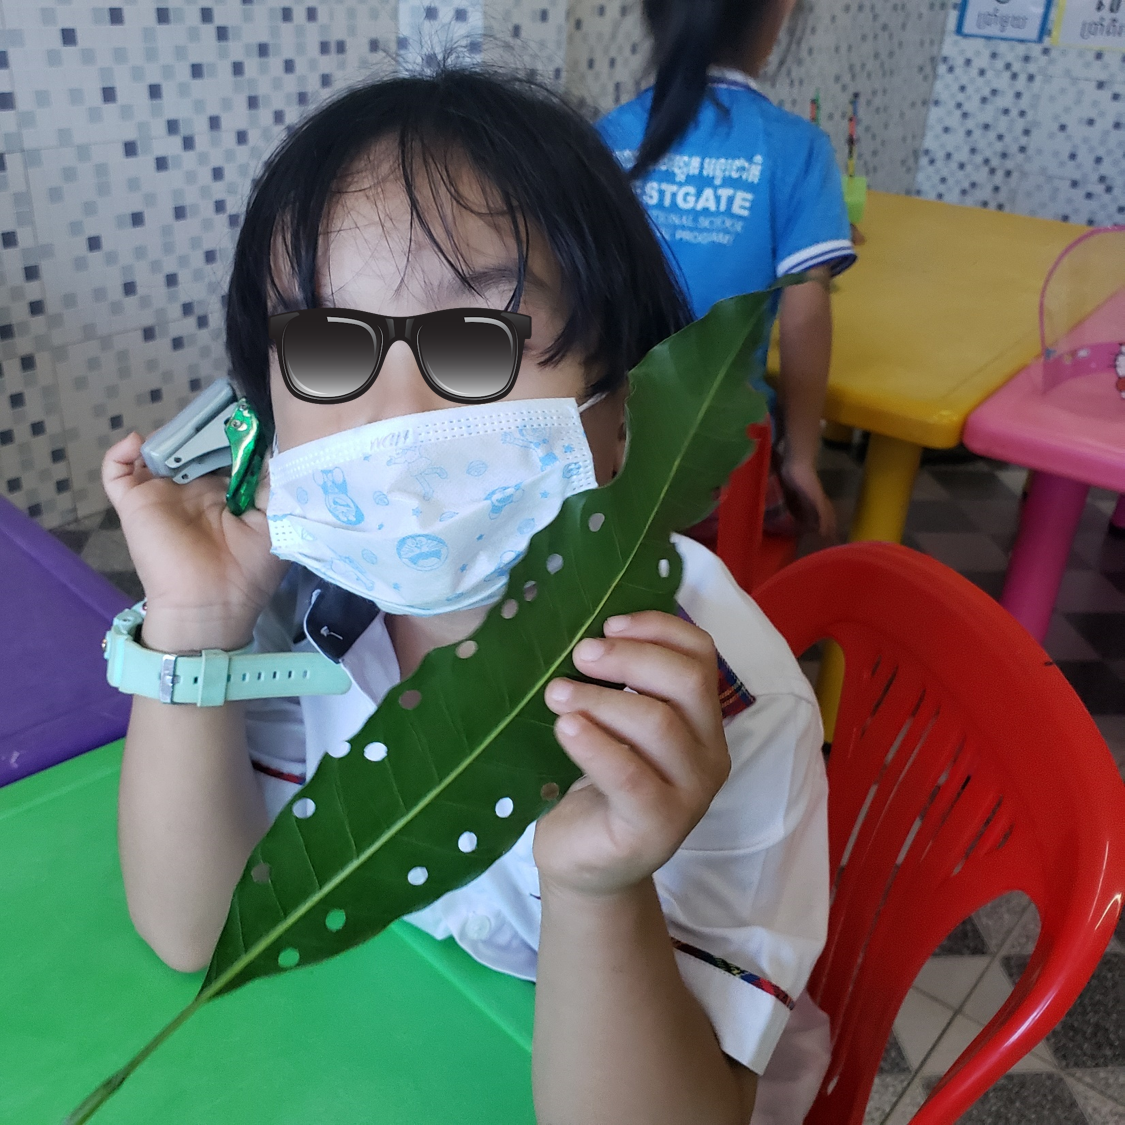
Leaf punch
This station sounds funny but again, another simple activity to put together. All you need are some single-hole punches and leaves. I grabbed leaves from our mango trees, which was great as they’re big and found some smaller leaves off of our durian tree. That’s it. My students really enjoyed this, it’s a random activity but great for experimenting with different textures.
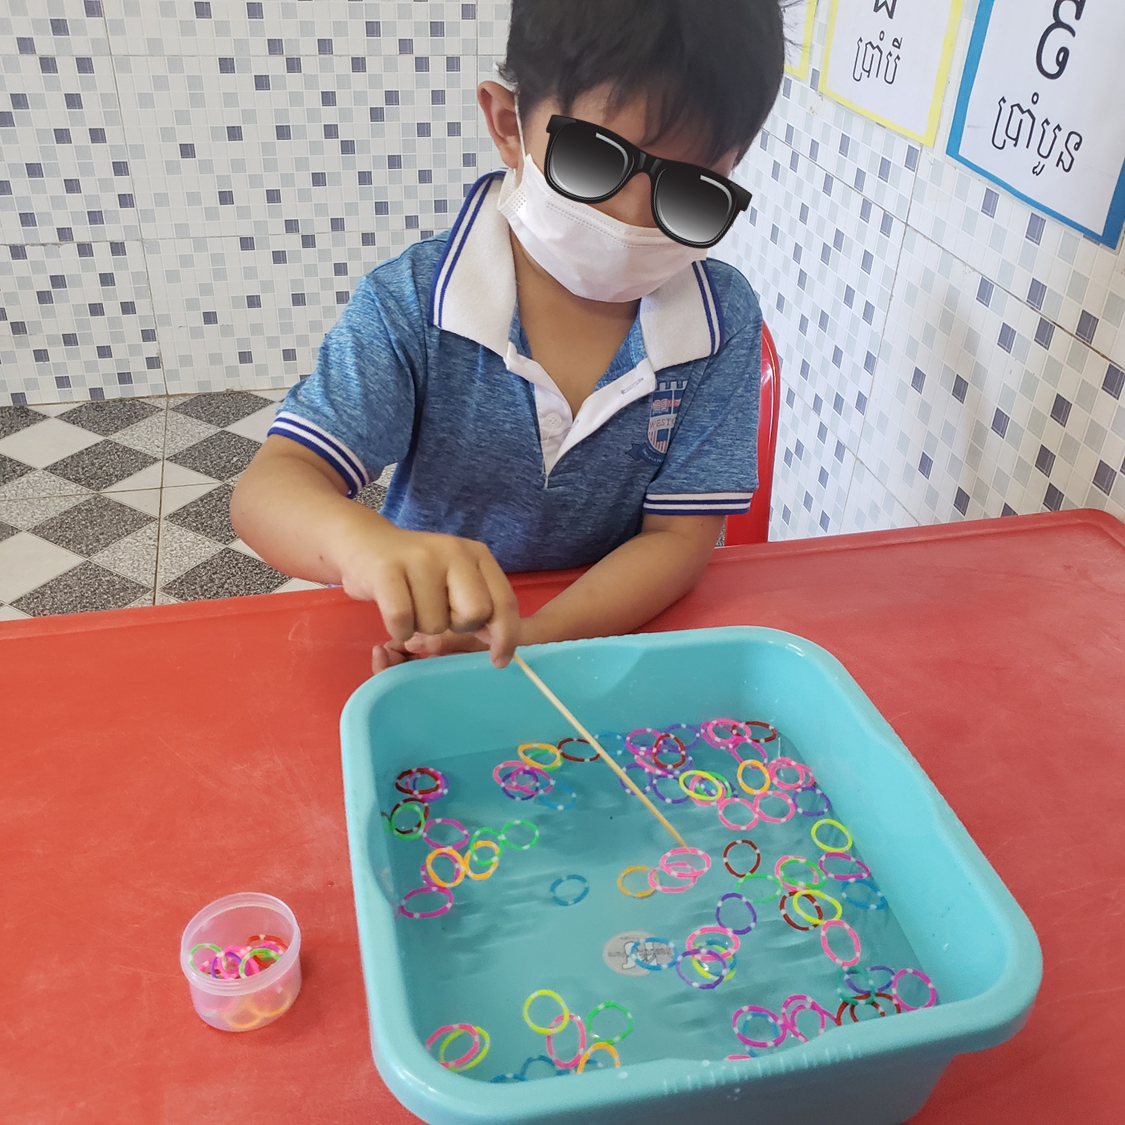
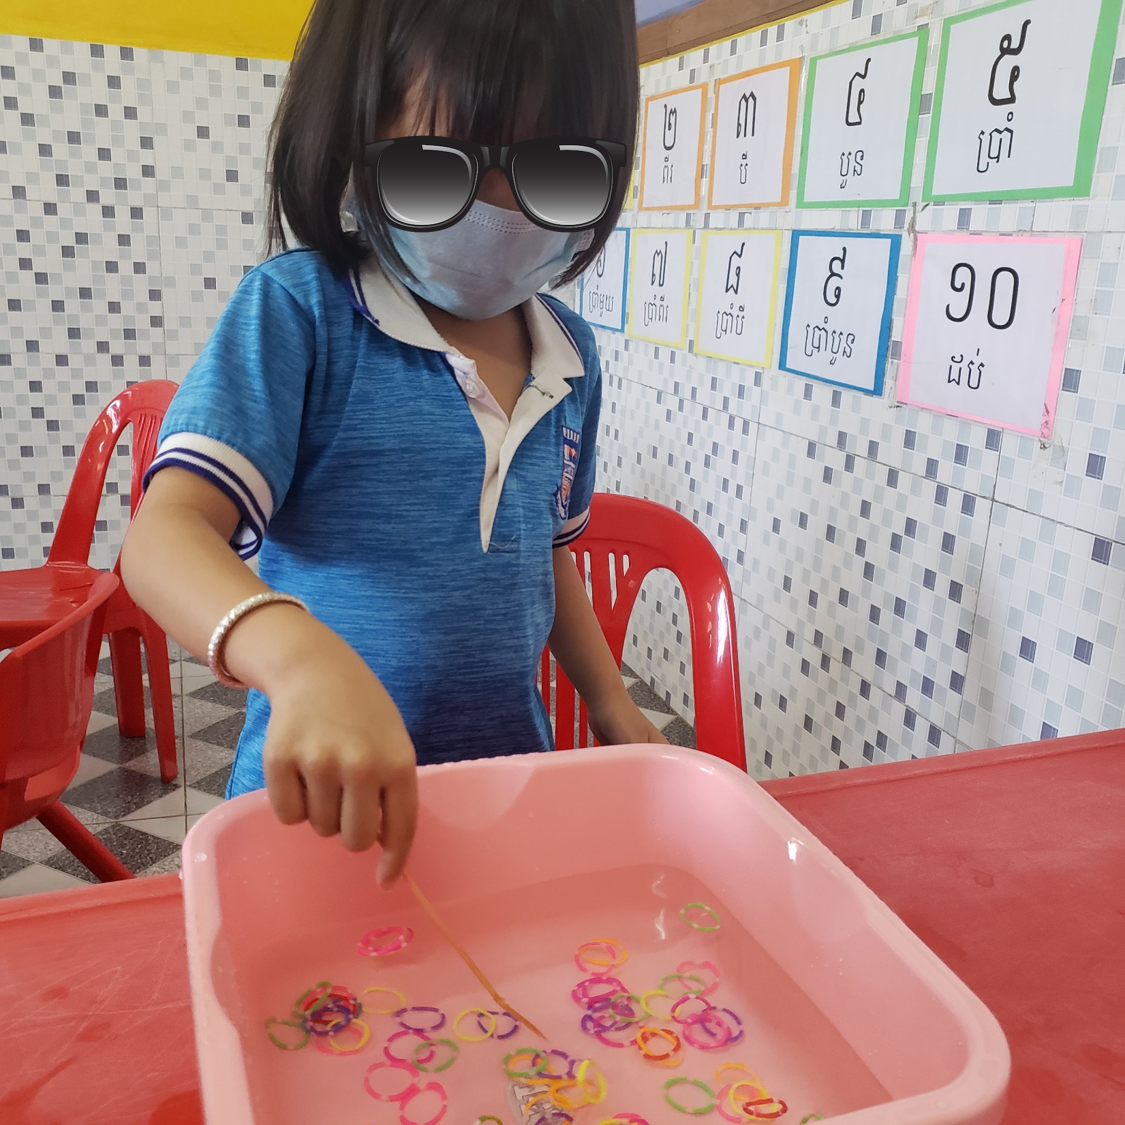
Fishing for elastics
This is exactly what the header entails. I used small containers to house the water (these were about a $1) added small, colorful elastic bands and gave the kiddies a stick (same sticks used earlier). They needed to fish for the elastics and place them into a small container. This was the favorite for the day, must be because of the water but they all absolutely LOVED it!
Well I hope that inspires you. I really love doing creative stations with my kids. They work for all ages and the kids benefit greatly from them.
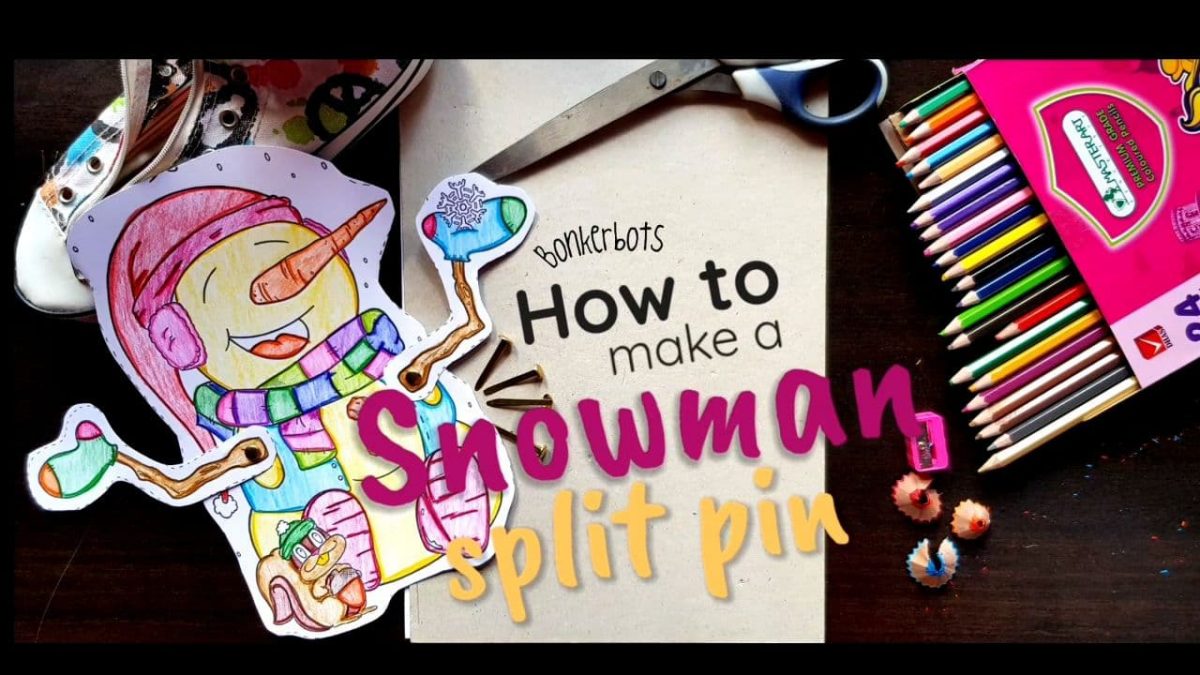
It’s mid November and we’re all searching for exciting Christmas crafts to do with our students. One of my all time favorites would have to be some sort of split pin craft. Many people don’t quite know what I’m talking about when I mention the word split pin but as soon as you describe it to them, they remember them from their childhood. You know, the little pin that lets your creation move its arms or legs etc. I think most folks are also confused as to where to buy these delightful little pins but I’m pretty sure that most bookstores stock them, they’re generally in little boxes hidden in a corner somewhere and an added bonus is that they’re dirt cheap.
I am rather surprised that you don’t find too many split pin templates online. I thoroughly enjoy making them and my kiddies all do too. They love showing you how their little creature is able to move :). Today’s post is going to take you through how to make a split pin craft and then also walk you through our split pin pack. This pack is one of our first products we created when we set up Bonkerbots, or rather K and L as seen in the pics. That was our original name and logo. Cute right? I think this product is a classic and it’s always fun when Christmas time rolls round and I know I can whip these little guys out.
Ok let’s get started…
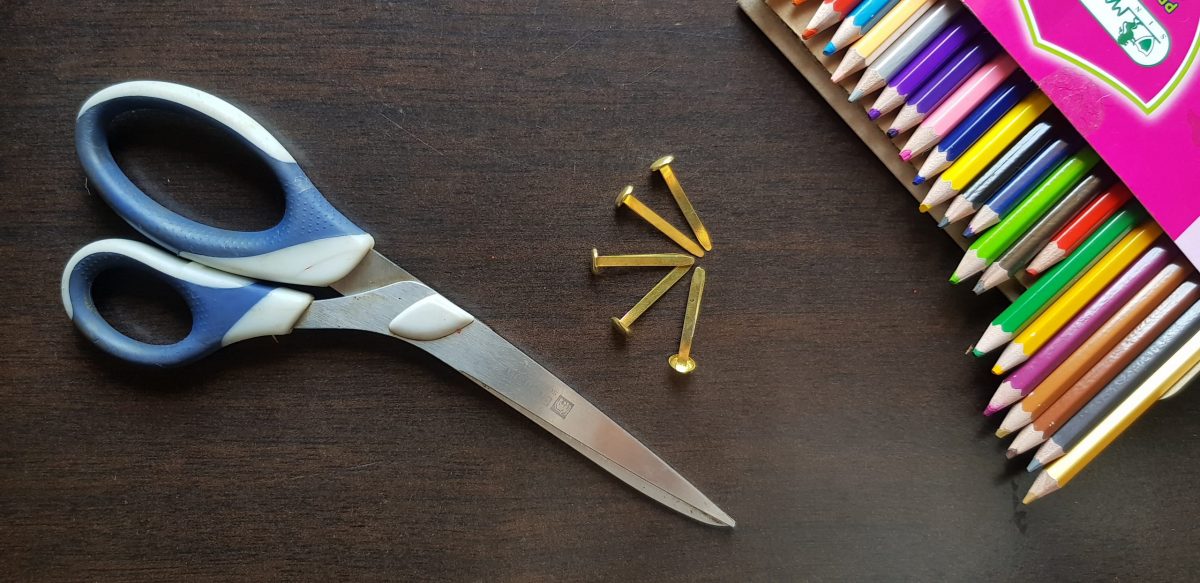
What you’ll need?
card stock / cardboard (thicker paper than regular)
coloring pencils
scissors
split pins
That’s it. That’s all you need.
Simply print your template out onto card stock. I highly recommend this to ensure longevity with the end result.
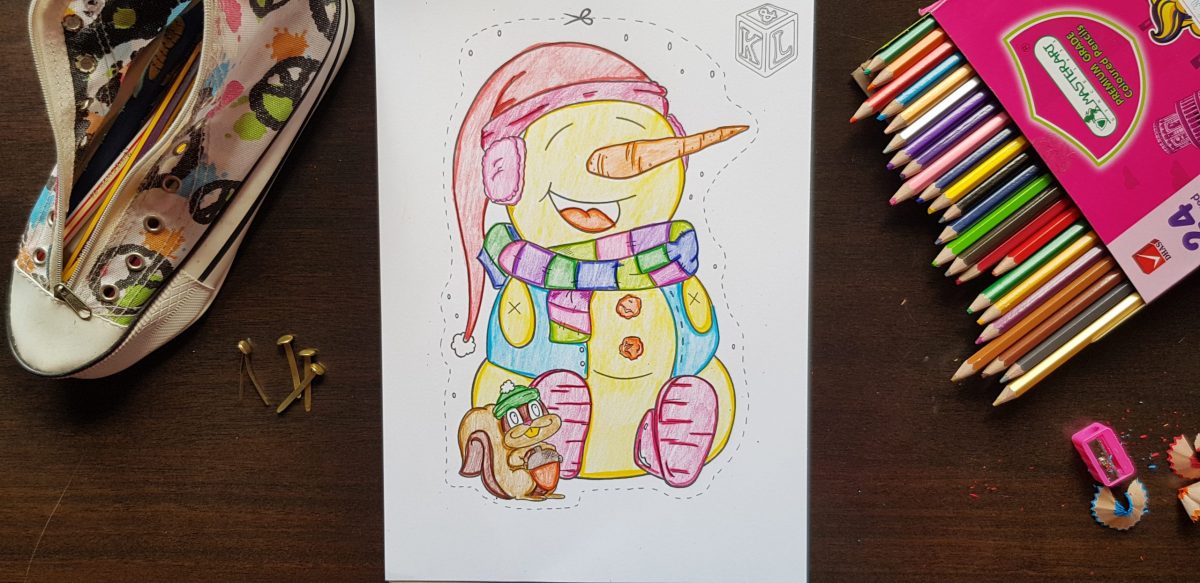
Step 1
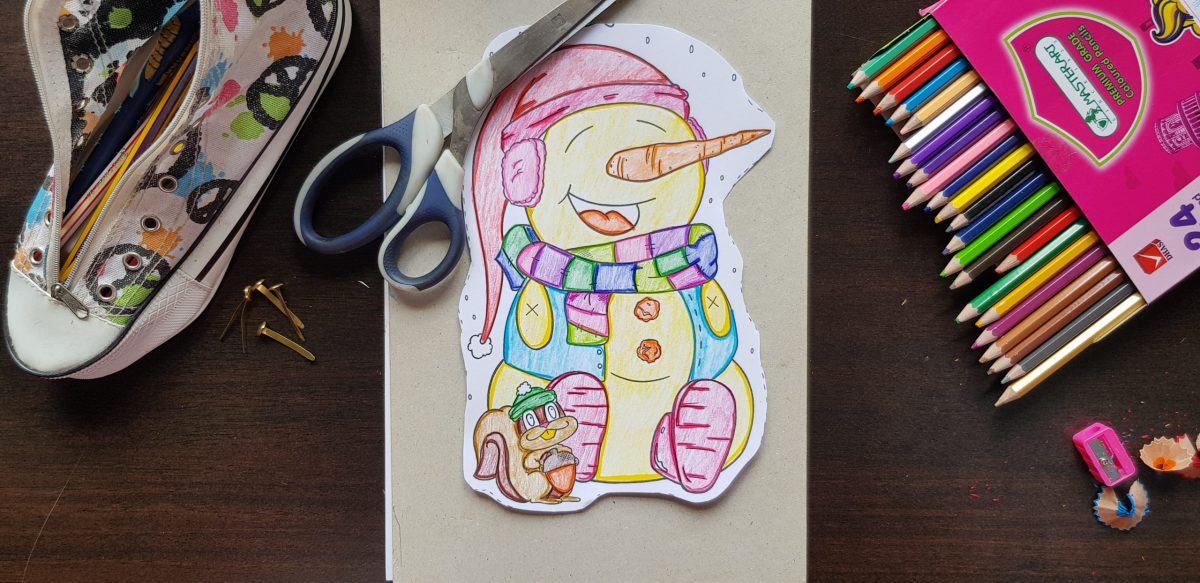
Color your template in. I decided on the Snowman, although it was difficult to decide. I have colored in versions of each and will let my students choose which one they would like ahead of time. This builds up the excitement too.
Step 2
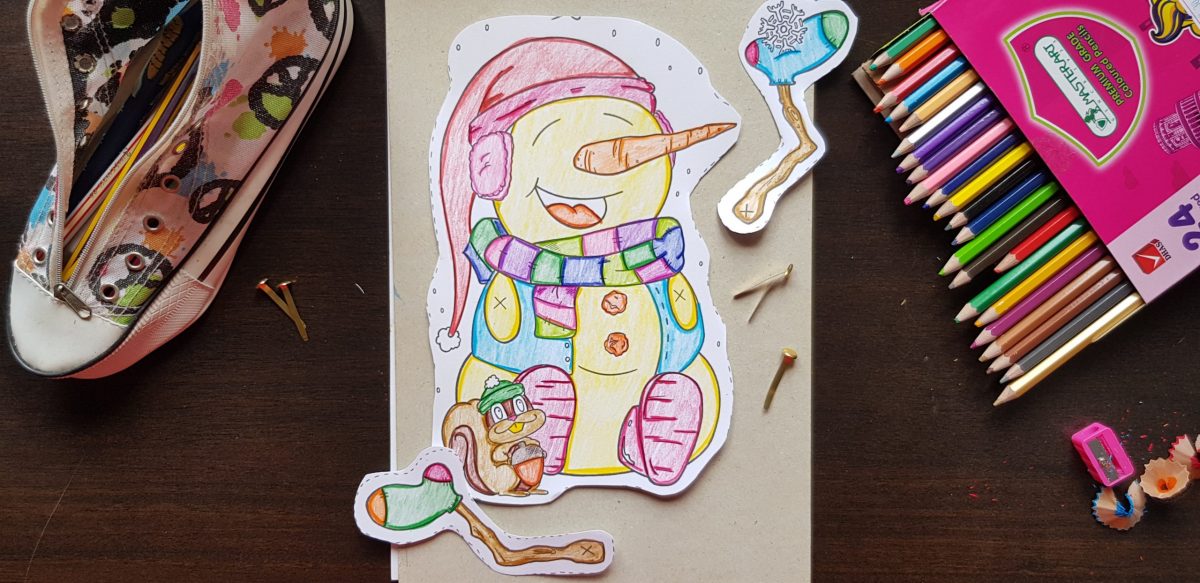
Cut your snowman out using the guidelines.
Step 3
Poke holes into the x’s. We used the tip of our scissors to help with this.
Step 4
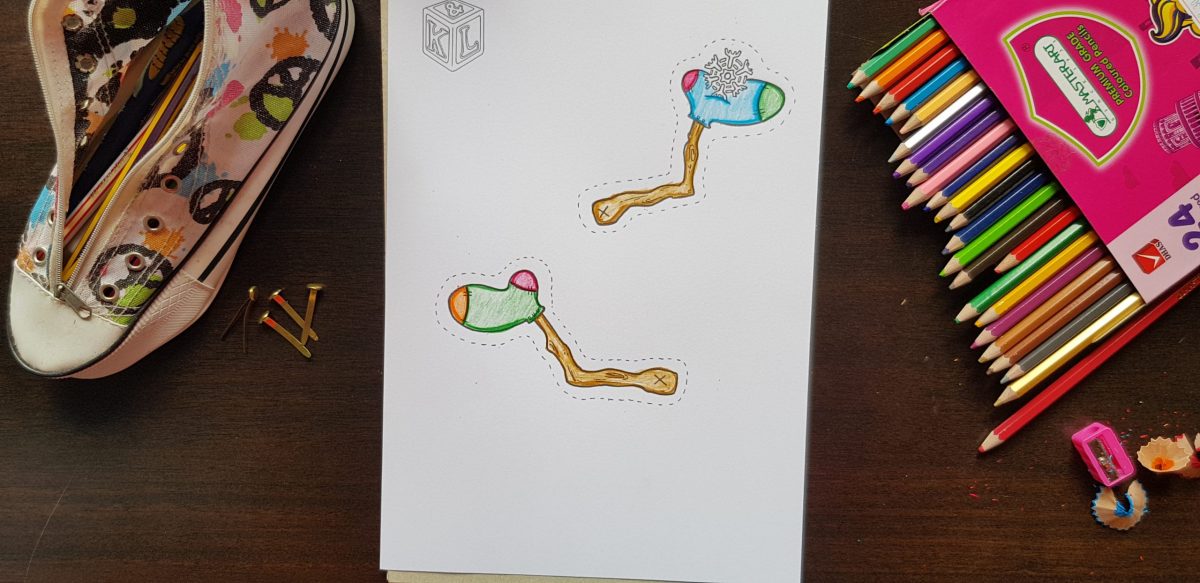
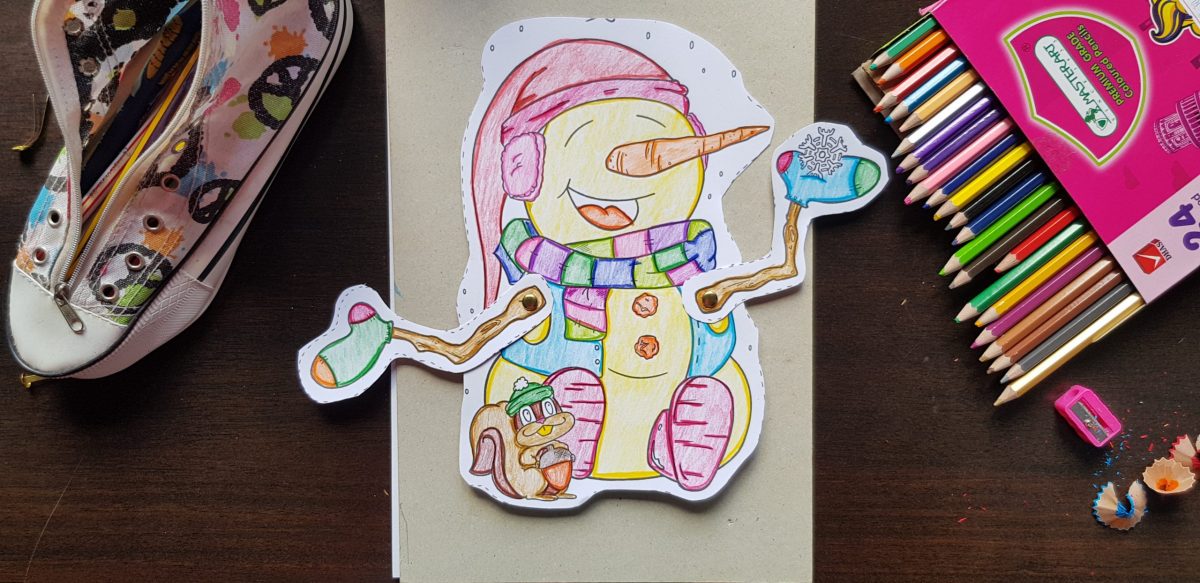
Attach the arms using the split pins.
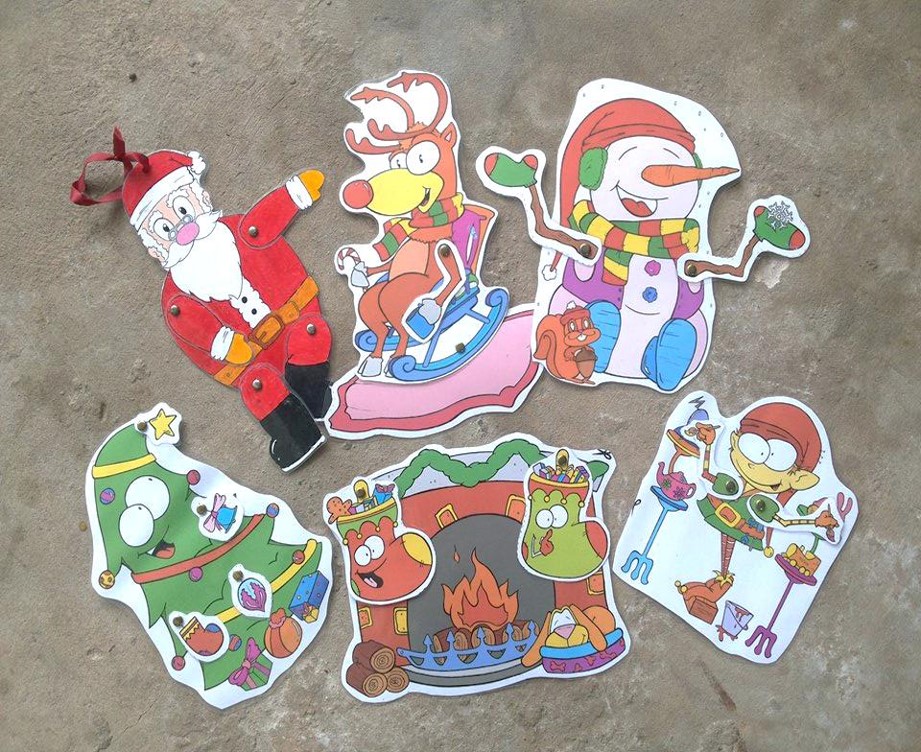
What’s included in the Christmas split pin pack?
Christmas tree
Santa Claus
Fireplace
Elf
Snowman
Reindeer
Each Christmas character requires 2 pieces of card stock. Don’t you think they look adorable? They all have such personalities. 🙂 Click on the link below to grab your own copy.
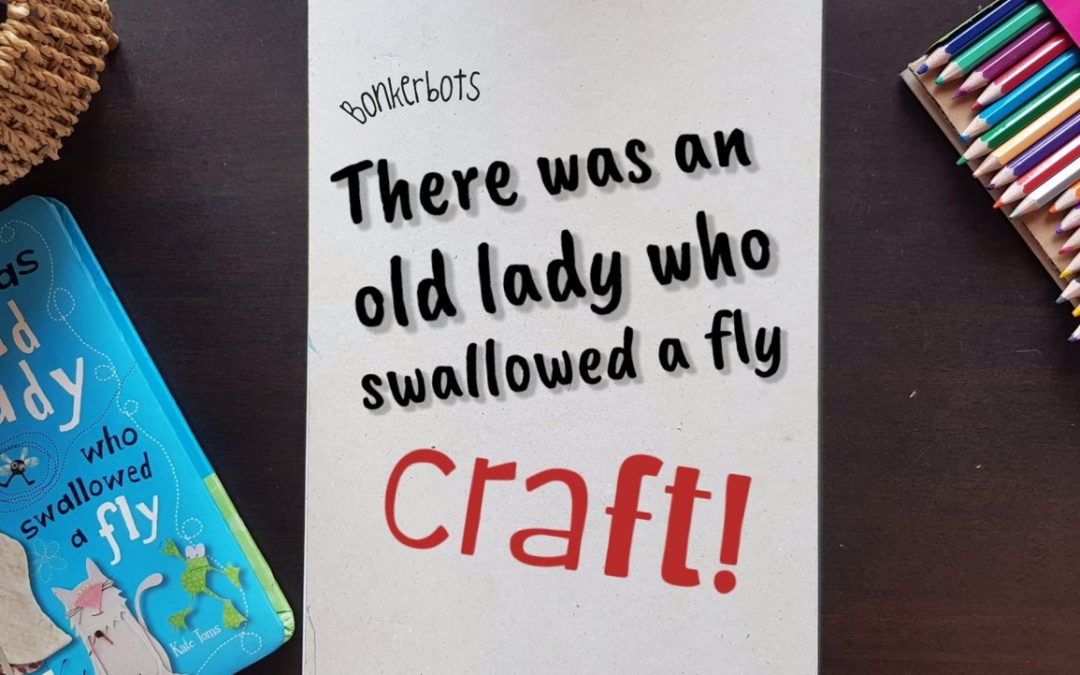
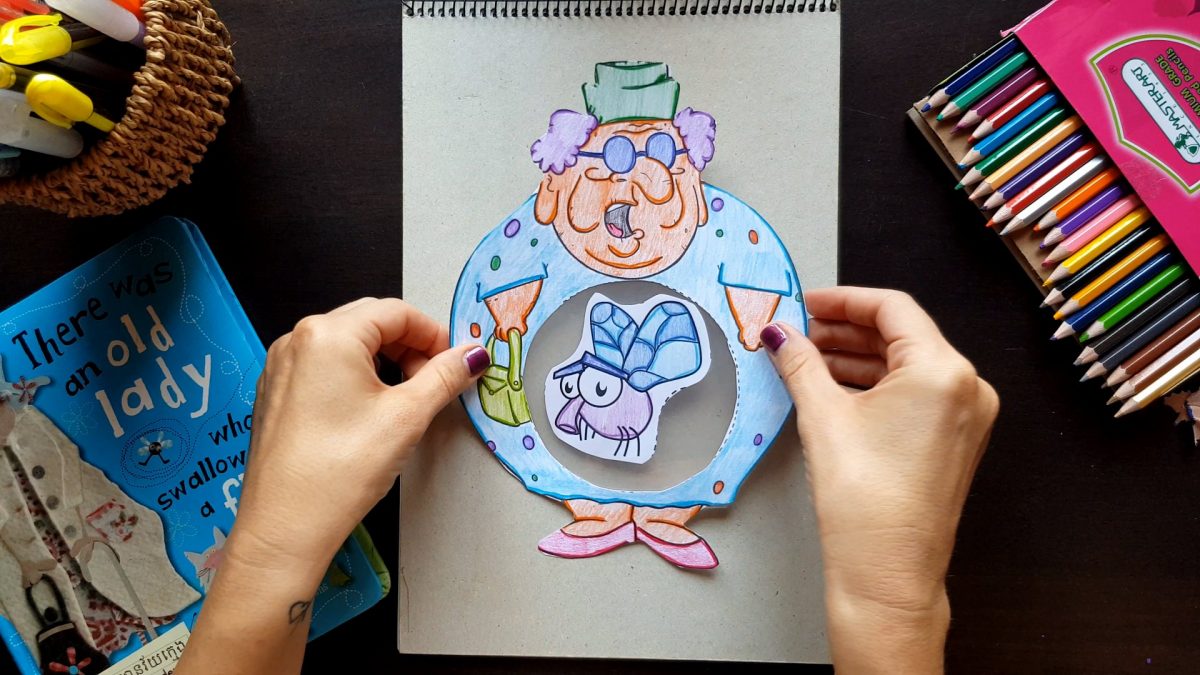
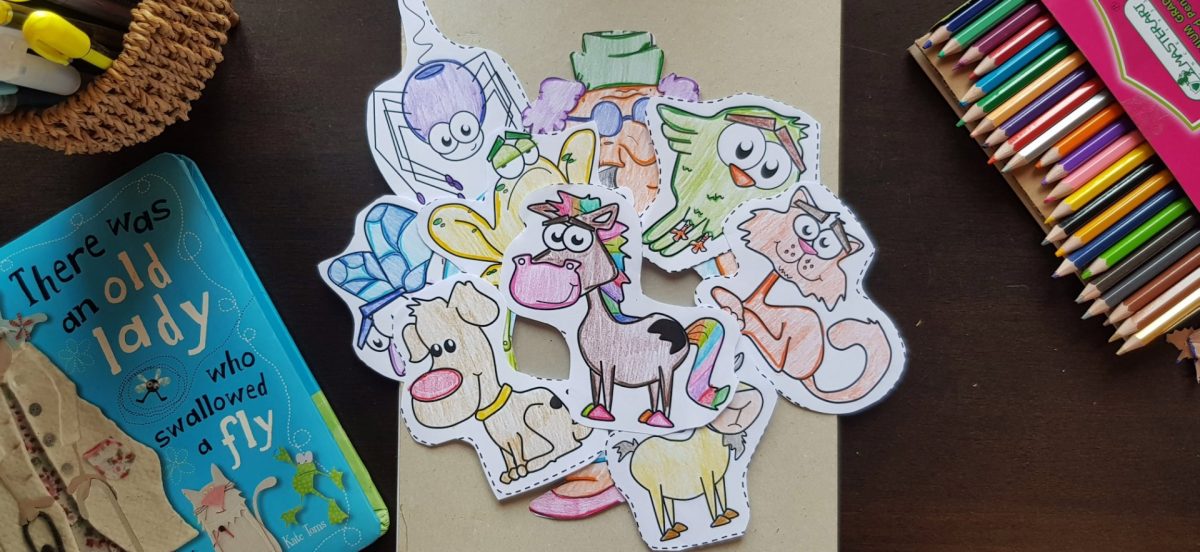
Oh my goodness! This little old lady who swallowed a fly craft has to be one of my favorite crafts that Keith has made so far. I remember the making of it. I had been searching for a copy of the book for ages, as it’s perfect for teaching sequencing and it’s such a bizarre little story…so when I finally tracked one down, I was beyond thrilled. Such a nerd.
There I was searching through Pinterest, looking for an activity but not finding exactly what I was looking for. So what does a teacher, who happens to know an artist do… get him to create your idea! haha! I really do love Keith’s imagination. His work is always unique and all his drawings have such character, like a proper back story. 🙂
Needless to say, the first time I whipped her out to my little Kindergartners, they were super excited and eager to take their own old lady home. It also got them retelling the story with confidence.
Craft = success!
They were able to cut theirs independently and just needed some assistance with sticking the plastic bag (zip log bag). We were able to buy a big pack of these for next to nothing, and it’s a handy thing to have in the office because they super versatile.
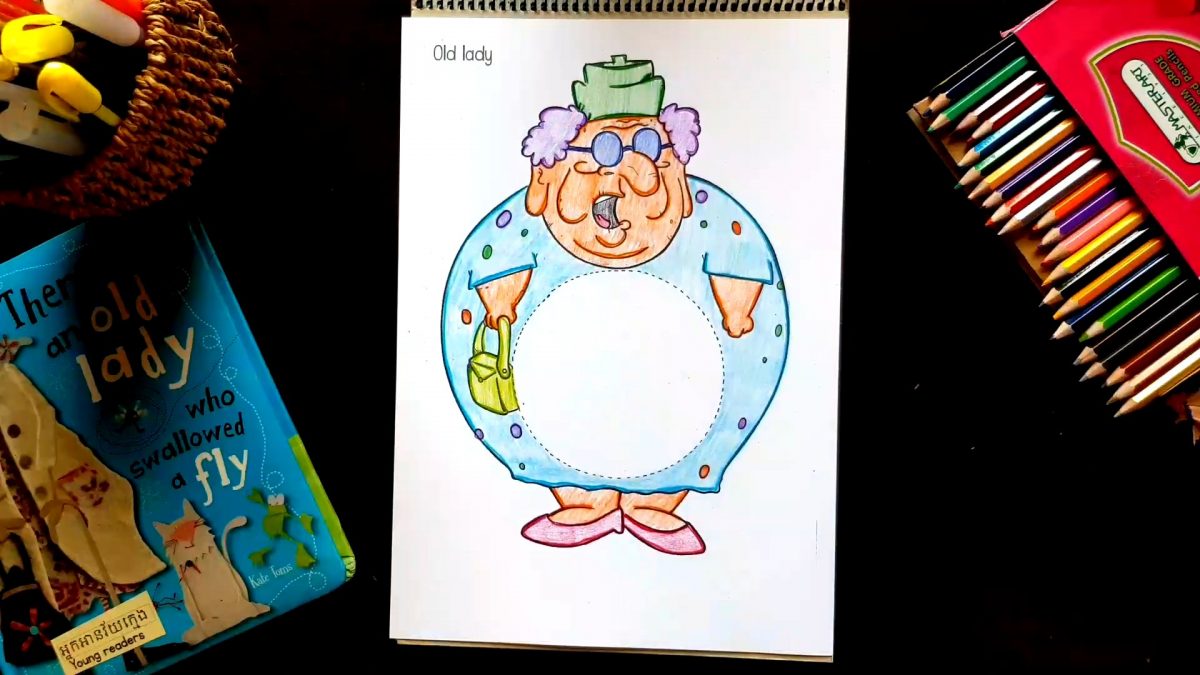
Step 1
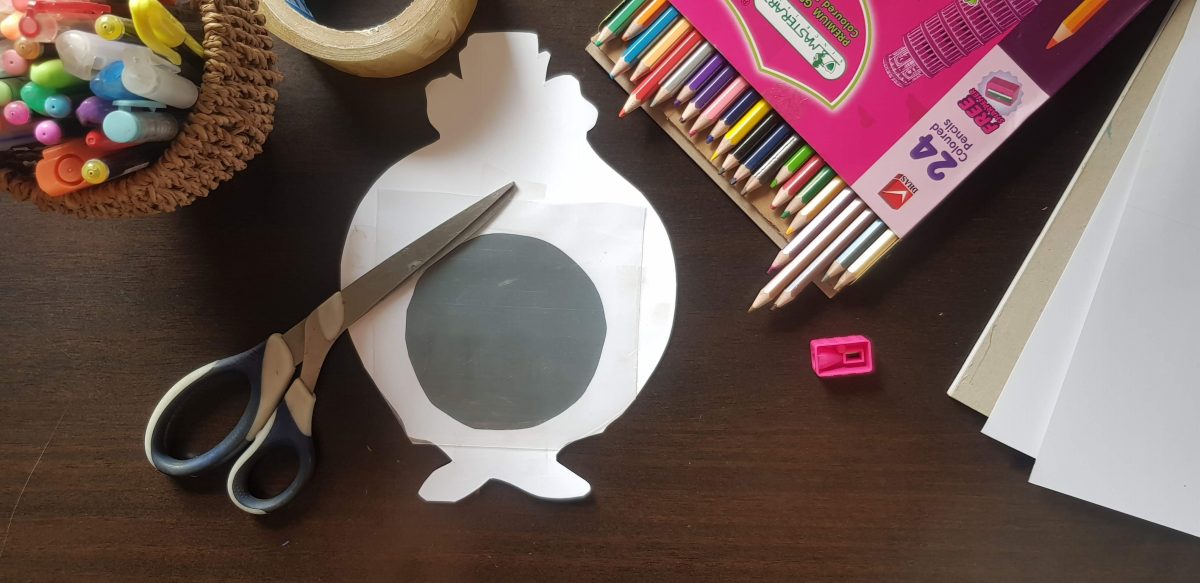
Color in the template. It’s always fun seeing how the kiddies bring theirs alive. I highly recommend printing this craft on thicker paper, AKA card stock / card board. It’s more durable, especially since kiddies can be rather rough with their work.
Step 2
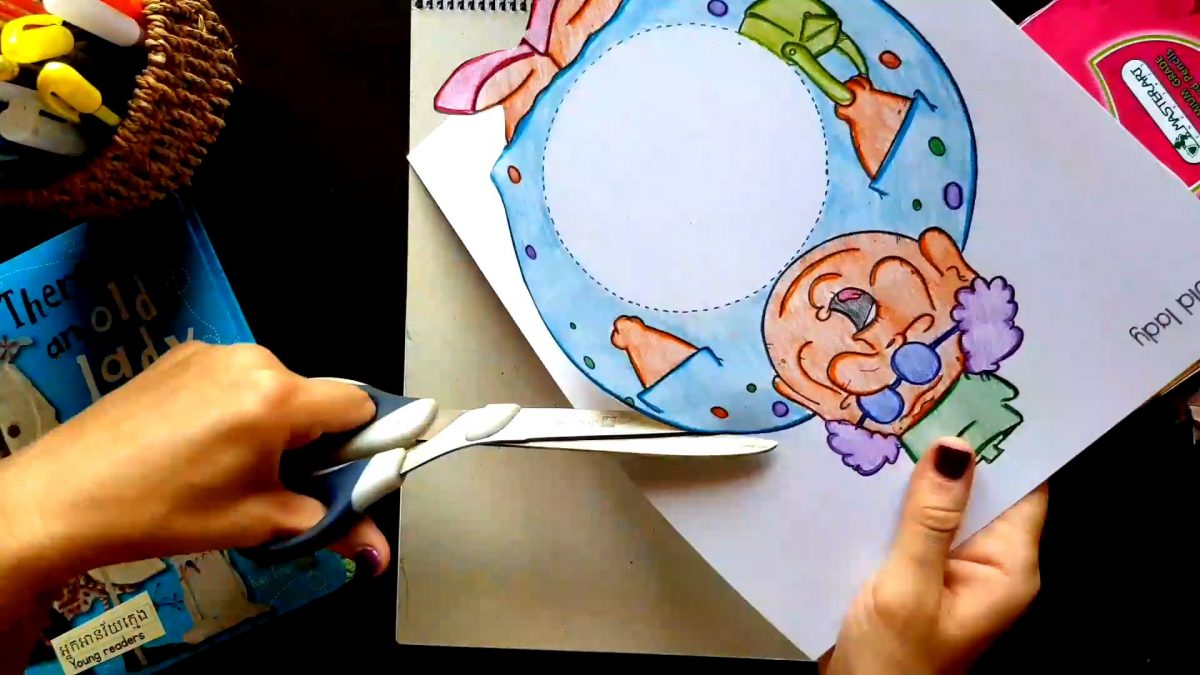
Cut the pictures out using the guidelines.
Step 3
Cut the old lady’s inner circle.
Step 4
Attach the plastic bag to the back of the old lady using scotch tape. Remember to keep top part open to insert animals and snip off any bits of plastic that are hanging over the edges.
Step 5
Let the kiddies practice their story telling skills and feed the old lady some animals.
I hope that your little ones will have as much fun as we did in creating the old lady who swallowed a fly.
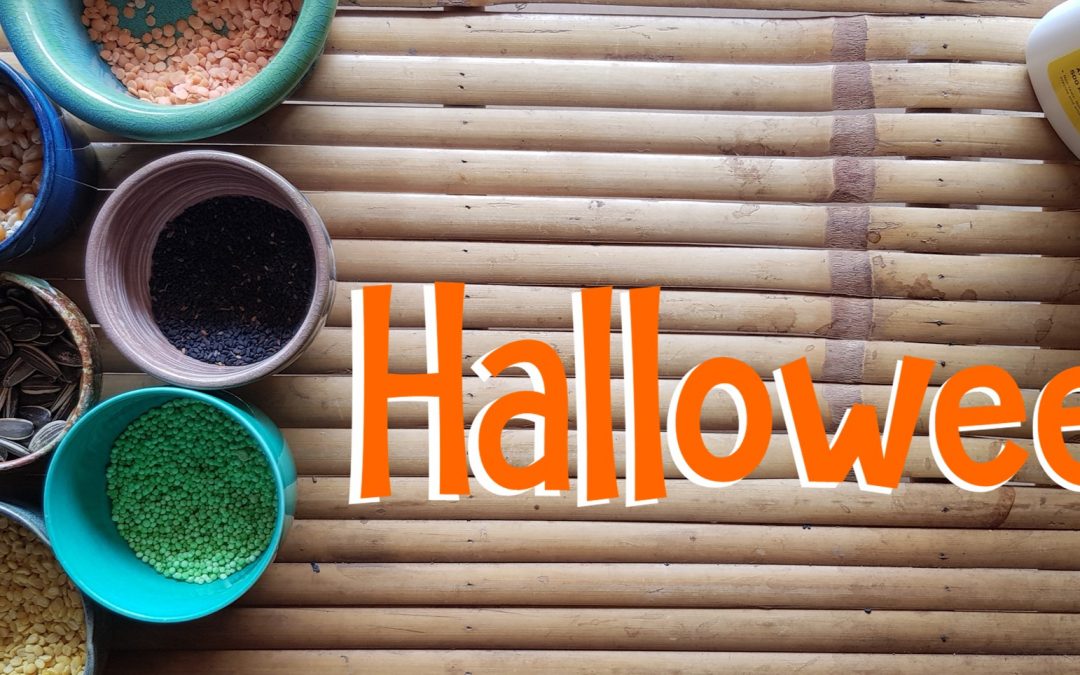
I can’t believe it’s already October. This has certainly been an intense year for everyone but on a positive note, things are improving. We’re back at School, which is awesome! It’s been 7 months since our kids were at School (we went online in March) so it has been an exciting and VERY busy first week back.
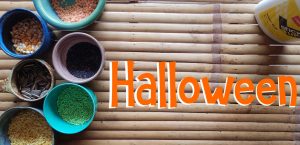
Normally we would celebrate Halloween with lots of games and activities but things will be rather different this time round. One thing I am really looking forward to are all the fun crafts. I thoroughly enjoy making crafts with the little ones and I know they LOVE them too. 🙂
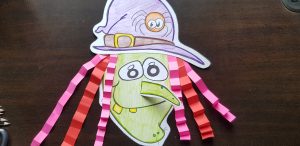
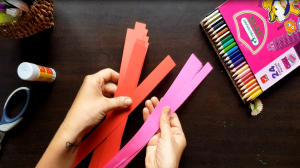
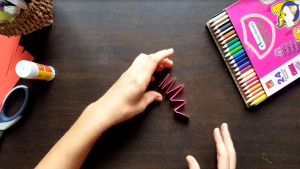
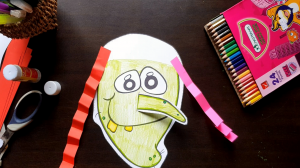
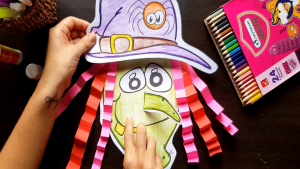
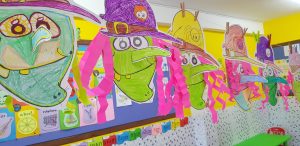
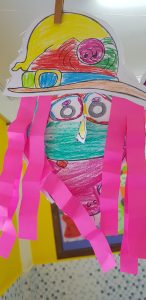
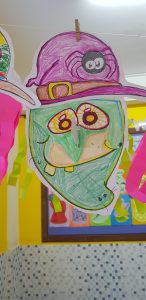
Witch
We created this little lady a few years back but she is still one of my favorite Halloween crafts. The kids really LOVE the 3D nose and it’s very interactive with coloring, cutting, folding the hair and then pasting it all together.
Step 1
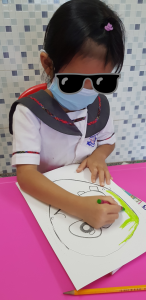
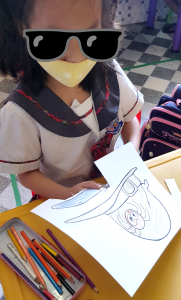
I’d highly recommend printing this craft of board (card stock), it’s more durable and makes for a great classroom display. Students just need to color in (using crayons or coloring pencils).
Step 2
Students will need to cut, using the guideline.
Step 3
Grab some colored paper strips and fold them to create a ‘curly’ look. Choose any color you like.
Step 4
Glue the hair on each side. Slice cutting line to add nose. Slide nose through hole and glue onto the back of head.
Step 5
Glue the hat on.
Step 6
Show everyone your rad craft. 🙂
Click the FREEBIE to collect your very own copy. We’d love to see how yours turned out, feel free to tag us on Facebook / Instagram.
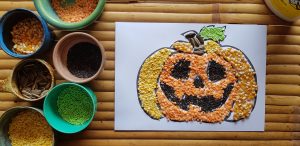
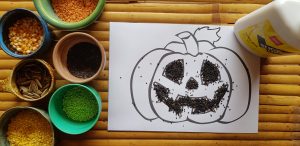
Oh my word! I ABSOLUTELY LOVE making food mosaics. I will make it work with any theme and boy, does it work. It doesn’t matter which grade I have made them with, from K- lower primary but they all ADORE it and are 100% zoned throughout. I am also always impressed with how well they follow instructions.
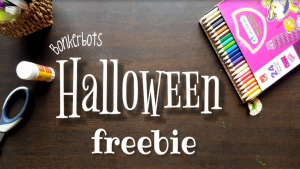
As Halloween is approaching, we will start making some really rad crafts. This year we have this cool FREEBIE for you, which you can grab at the end of the post. Be sure to check out our other Halloween Freebies too (Links at end of our post).
Doesn’t it look super duper cool?
Mosaics are really fun to make but the end result is pretty epic. The kids love working with the different textures and are super proud to show of their creation once they’re hanging up in the class.
What ya making?
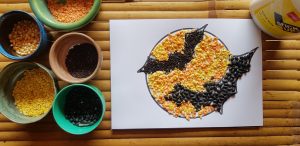
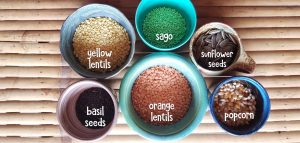
You will need:
Board (card stock)
White glue
Yellow and orange lentils
Popcorn seeds
Basil seeds
Sago (green)
Sunflower seeds
You can totally change your ingredients to whatever is available and affordable. The ingredients I used are very affordable this side and most of them cost less than $2 for each pack.
Let’s get crafting!
The first thing you will need to do is ensure that all ingredients are easily accessible to the kiddies. I really enjoy these trays that I found in the supermarket. They’re a perfect size and I must say, I am always impressed at how little mess there is at the end. Don’t get me wrong, there is certainly a mess but not nearly as much as one might expect.
Normally my kids would be sitting in groups and they would share trays but we’re back at school, following strict guidelines so the trays will be slightly different now. I generally have the small white glue container for each table, wonderful opportunity for the little ones to practice their squeezing (great hand workout), although I also walk around with my glue to help those who need.
We go through the rules and then work step by step making our mosaics.
Once they have glued the goodies, they are instructed to lift it up to let the excess fall down. We generally let it fall on the ground, which we will sweep up once finished. Even though we’re making the same craft, it’s always fun seeing how unique they each turn out.
We also walk through how much glue is actually needed. Teachers are well aware, there are ALWAYS one or two kiddies that feel they must use the entire bottle of glue on their masterpiece 😉 but overall, they really handle it all with ease.
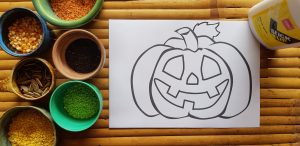
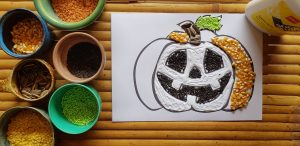
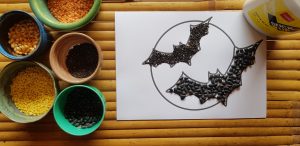
This year we have made the pumpkin template, bats flying with the moon in the background and a skull template. It’s hard to choose which one I like more as I think they turned out beautifully. I am also a sucker for making these. I find it rather relaxing;) haha 🙂 I get way too excited when doing these with the kids.
Sure…making crafts can be tiresome but it’s well worth all the prep and the pure joy in the faces while making it. 🙂
For the bats, I used basil seeds for the smaller one and black beans for the bigger one. I really like the effect it made.
Instead of only using one ingredient for the moon, I chose to mix the yellow and orange lentils and even added some popcorn seeds. Again, I am a big fan of how they turned out.
So whether you’re a parent creating this with your little one at home or a teacher making these with a class full of eager faces, I hope you have a wonderful time. I would also love to see how they turned out and which ingredients you used. 🙂


 For the bats, I used basil seeds for the smaller one and black beans for the bigger one. I really like the effect it made.