2020 has been a rather difficult year for everyone around the world. Not only have we all had to deal with a pandemic but the constant weather changing brings its own hardships. Cambodia goes through it’s yearly Monsoon season, however, the last few years have not been the usual downpour. This year has certainly made up for it. The rain came but… it came rather late and plenty of it. This affected many Cambodians as their homes and villages flooded. Many had to be evacuated and they lost everything. On top of that, some of our neighboring countries opened their dam walls, which caused more flooding in several areas.
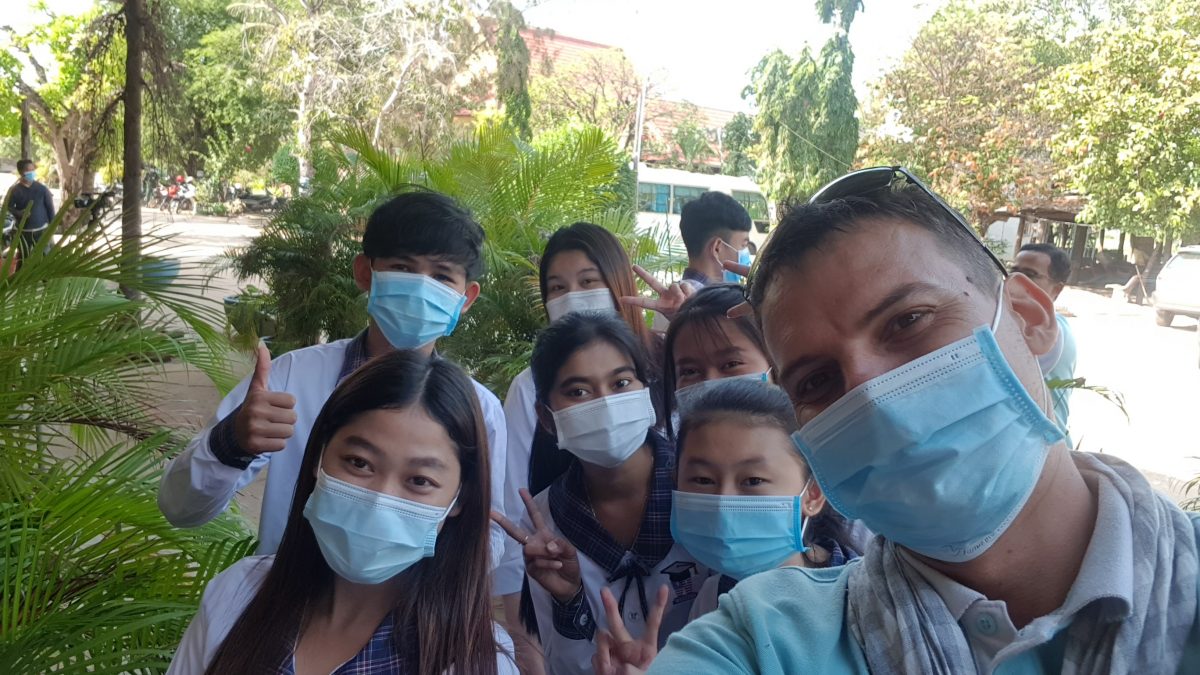
Keith with some of the Grade 12 students
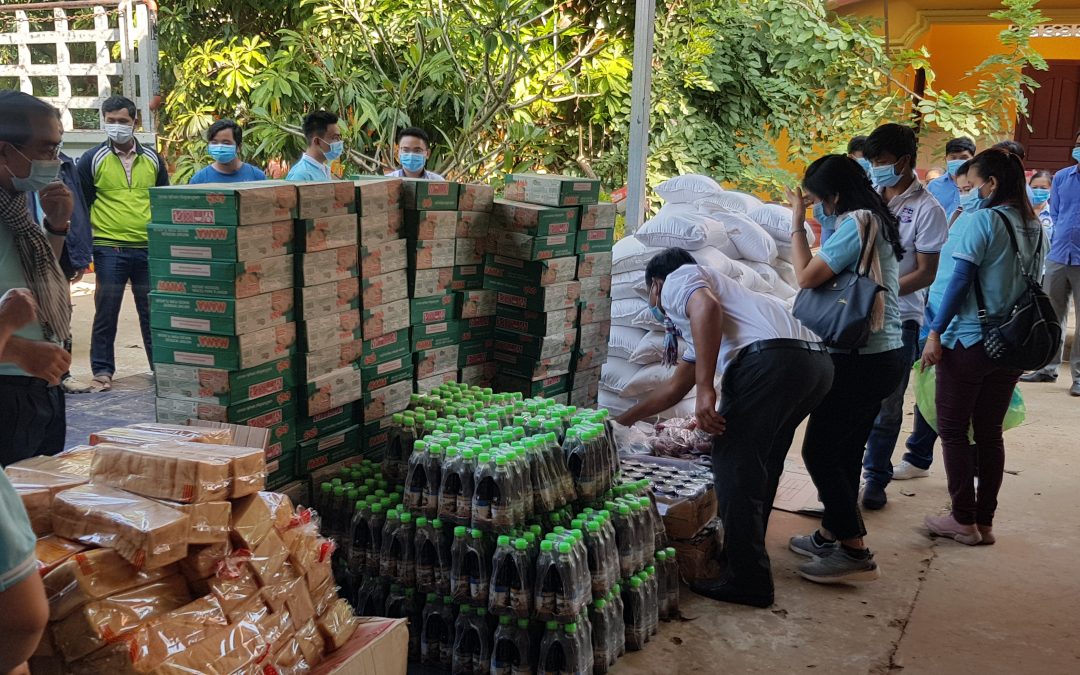
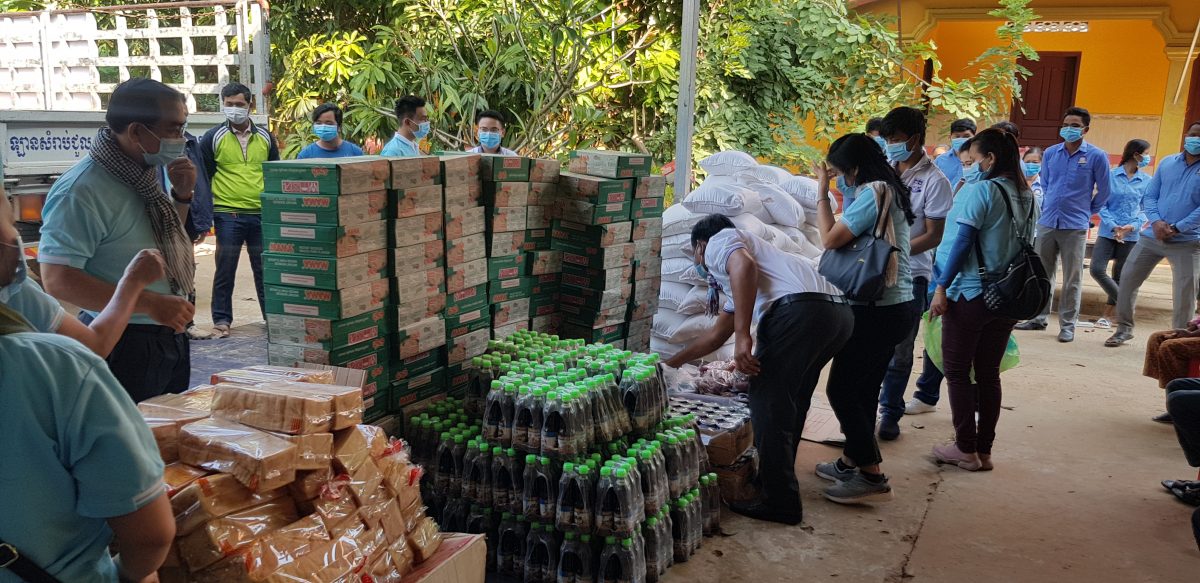
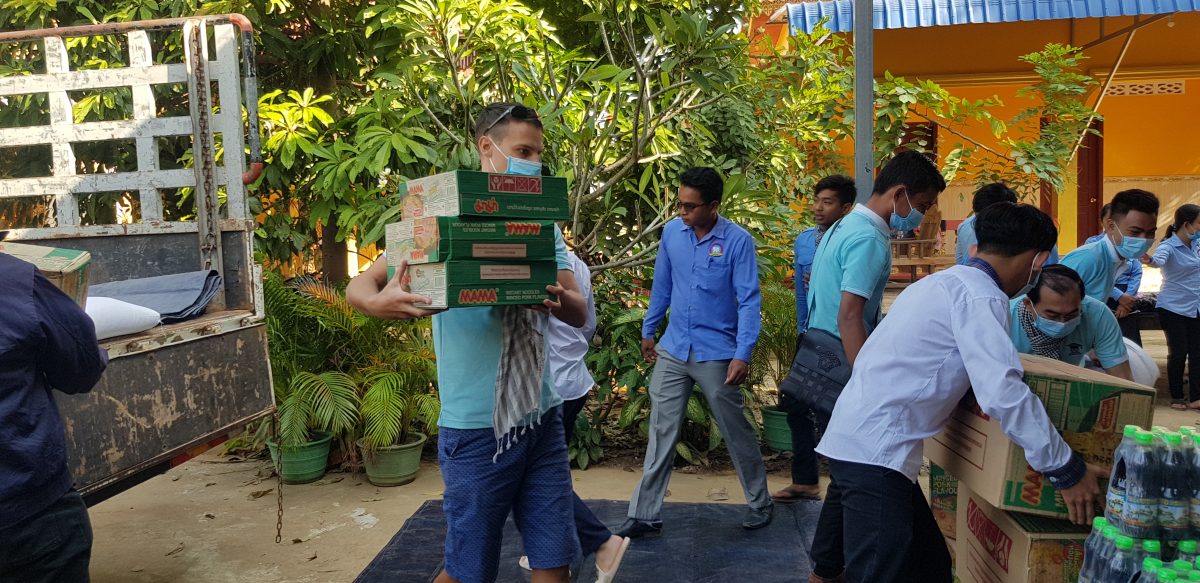
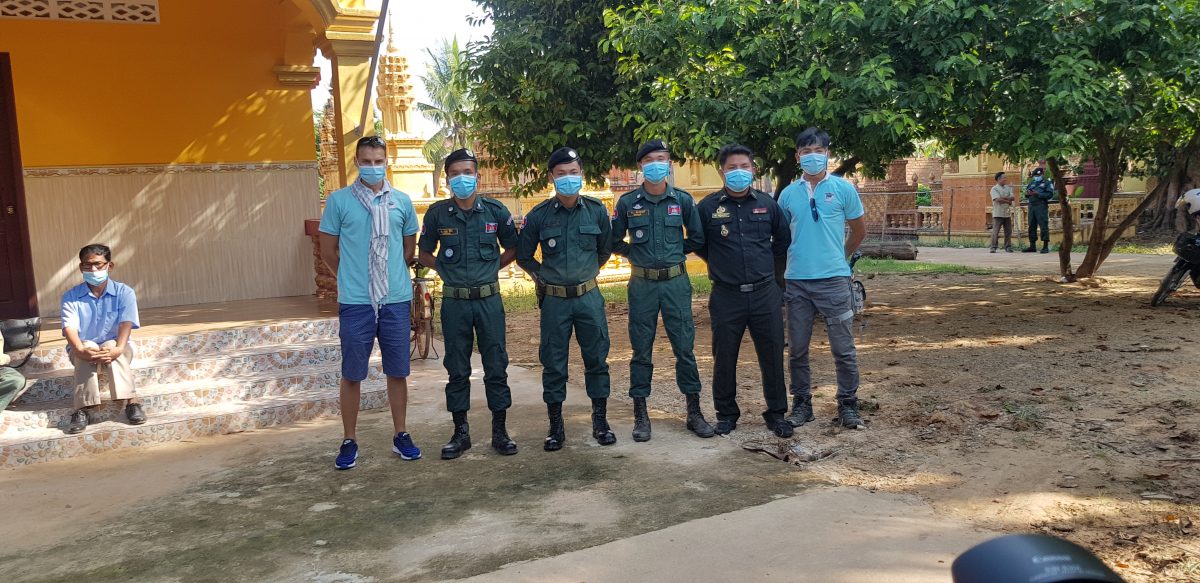
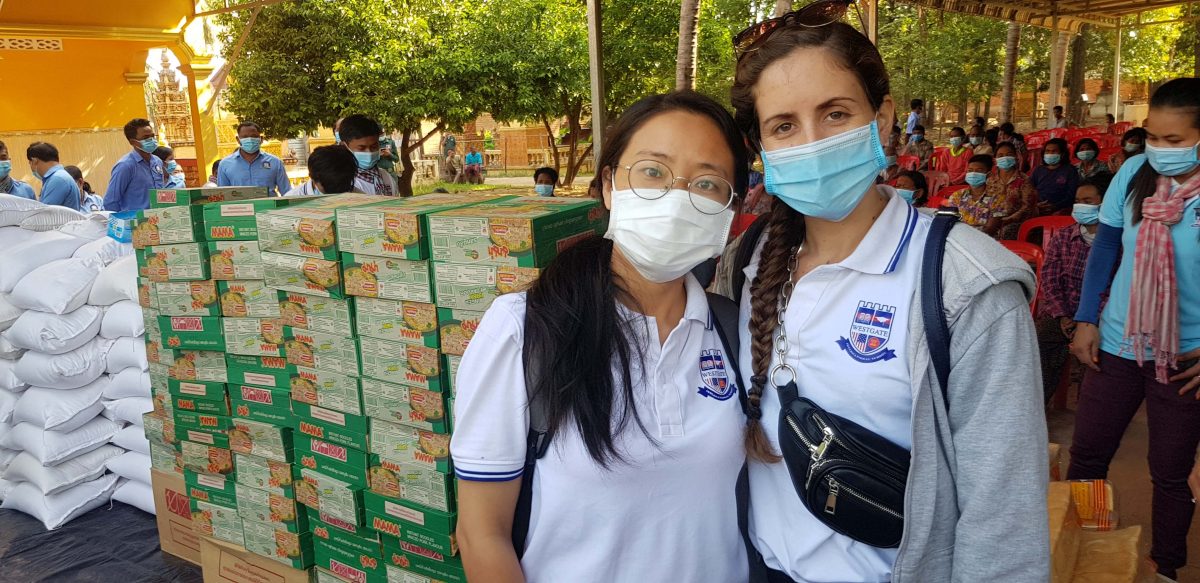
During these tough times, it has been amazing to see how many people have come together to help those affected. Many organisations provided essentials, cooked meals, clothing and health care. Our Schools decided to also contribute as many care packages as possible. These care packages consisted of 15kg rice, noodles, fish sauce packs, bread, sausages, condensed milk and a small cash donation. Students, parents and staff all raised some money to put these packages together and on Monday, 9th November, the staff and some of the Grade 12 students went to deliver them.
We headed to Angkorchum District, Kol Commune where we stopped at two different locations. We met some of the families at a Pagoda and the others at a Primary School. We were able to provide essentials to 90 families, which will go a long way. We have been living in Cambo for quite a few years now and we have had several reminders and realizations as to how fortunate we are. It’s extremely important having these smack in the face realizations as it’s so easy to get sucked into your life and how many ‘problems’ you have. However, none of my problems are worrying about putting food on the table or worrying about where we will stay as our home has been damaged. However, the Cambodians are resilient and happy people. They are super friendly and as many people say, once you have a Cambodian friend, you will have a friend for life.
Dynath AKA Donut and Keith
The boys with the police
It was a beautiful drive out into the countryside, especially this time of year as everything was super green and luscious. Once we delivered the goods, we headed back into town and were honored to have been part of that experience.
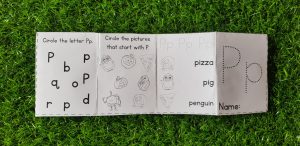
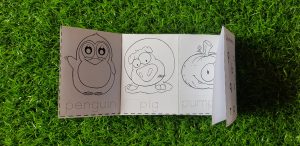
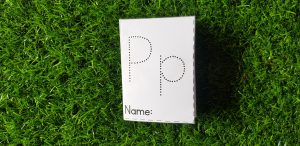
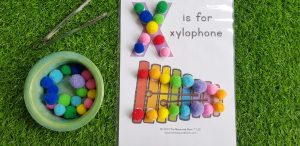
If you’ve been been teaching young learners, then no doubt, you are familiar with all sorts of mini books. We use them for everything from introducing new vocab to reading practice to Science to Math and so on.
There are plenty available online but if you’re like me, you enjoy making them yourself. I love picking out the clip art and choosing the font so be sure to grab yourself the FREE blank mini book template blank template.
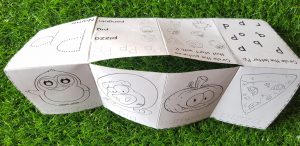
If you’re completely new to mini books and are unsure how to fold them, then do not worry. The video above shows you exactly how to do it and also shows how easy it is or keep reading below.
Step 1:
Print out your mini book and cut the outline.
Step 2
Fold the paper in half.
Step 3
Fold the paper on all the vertical lines.
Step 4
Now cut your book on the dotted line in the middle of the paper. This is going to help fold it into its final shape.
Step 5
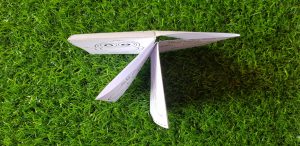
Now you’ré going to pull the two center vertical lines (where you cut the middle horizontal line) to create this shape as seen above.
Step 6
You’ve reached the final step. Just fold the cover over and you now have your very own mini book. How fun! 🙂
We’d love to hear from you. Let us know what you think and stay tuned for some more exciting activities.
One of my favorite parts of teaching young learners, is looking for and creating resources for developing their fine motor skills. Once again, my dear friend Pinterest comes to my aid with an insane amount of ideas. Some of the ideas take a lot of prep and others use everyday items to create these engaging activities. Today’s post is a break down of some of the activities we use in our school. As you may have noticed, I have titled this post, Part 1 as there are just far too many ideas for 1 post and I shall definitely share some more later on 😉
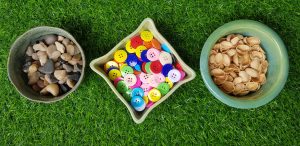
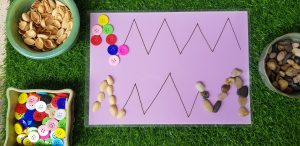
Buttons, stones, pistachios?
This activity requires very little prep. All you need is:
Colored paper
Marker (sharpie)
Little stones / pebbles
Colored buttons
Pistachios / Sunflower seeds
All you need to do is draw different lines / waves / squiggles onto your paper, laminate or insert into a plastic folder and then choose which medium you want to use and you’re good to go.
We love alternating ours so sometimes we use the little stones or our buttons. You now have an excuse to eat countless amounts of pistachios. ‘It’s for work, honey!’ haha. Why not use sunflower seeds, watermelon seeds, pom poms and the list goes on.
The kiddies are 100% zoned throughout this activity and once they have completed the page, they are thrilled to present it to you. What’s not to love about it?
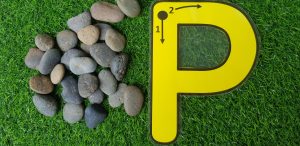
Letter formation
You will need:
stones / pebbles (larger ones)
letter cut outs / numbers (whatever you would like them to ‘trace’.)
grass mats (great visual and sensory effect)
This activity can be adapted countless ways. I really enjoy using the larger stones that I purchased at a nursery for around $5. This was also a score as it has been quite challenging finding things around my little town. However, Siem Reap has developed tremendously in recent years and one bonus is having access to all these delightful goodies.
I also love doing this activity on top of the grass mats, it looks really cool and offers another cool texture for the kiddies to experience. I really enjoy using the letters to practice formation and it’s always a hit.
These blue stones, as seen below, were a fabulous little find and come in super handy. Many teachers ask if they should be worried about using these smaller materials. Obviously I don’t just hand the stuff out and let them run wild with it all. I also always use these during controlled stations / centers. That way I can keep a watchful eye. We also walk through all the rules before completing the activity. I haven’t had any problems with kiddies following, purely because I think they’re really enjoying working with different materials.
Don’t they look so pretty? 🙂
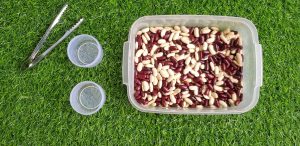
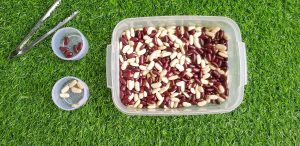
Red beans, white beans, beans everywhere!
You will need:
Beans (red or white / any 2 colored beans)
Tongs / Tweezers
Container – to store the beans
Smaller container – for students to separate the beans
Another easy activity to set up. I bought some plastic containers (tupperware) and the tongs (tweezers) from what we call here, the 2500 riel store. Basically 50 cents for majority of the items. That store has been such a haven for finding resources. A real win.
The beans came packaged from the supermarket and one pack was more than enough to fill 2 containers. The tongs were also an awesome find as some are a little tougher to use (harder to squeeze), which works out perfectly for those who are ready for more of a challenge.
Kiddies just need to use the tongs to pick up the beans and separate them into the smaller container. Looks real easy peasy but it’s not, especially if they haven’t developed their motor skills. I think this works beautifully in the classroom and at home. This activity is very adaptable. Another option would be to have kiddies practice counting and placing the correct amount of beans into an ice tray and so on.
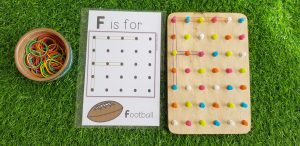
Geo boards
You will need:
Geo boards
Colored elastic bands
Alphabet / Number / Shape cards
I have the hubby to thank for these. I desperately wanted geo boards after seeing several incredible ideas online and after searching the town, DIY was the answer.
We used small chopping boards and push pins to create them. I must say they have really represented. We have had them for a long time and they are still very much in good condition. Thank you Hubs.
I like to have the kids practice forming the letters and I found these PERFECT cards in teachers pay teachers by Play to learn Preschool.
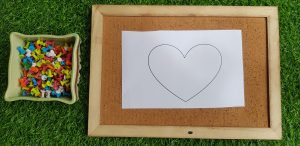
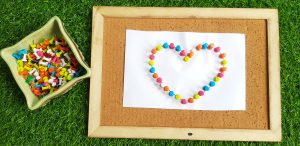
Push pins
You will need:
Cork board (or card board paper lid)
Push pins
Print out
How adorable is this activity? I LOVE it! Not only is it super easy to prepare but it’s also really engaging, plus time consuming if Mom needs a little quiet time at home 😉
Simply print out an image / letter / number that the little one is going to copy, grab some push pins and a cork board (I have also used the lid of the container that paper comes in and that works amazingly) and let little one have a blast.
This isn’t just fun for the little ones, I’ve seen our teachers and TA’s quite happy doing this. 🙂 🙂
If you’re unable to get hold of the cork boards, then no stress! Grab some paper box lids, no need to make them pretty although you could paint / spray them if you must. 😉 They actually work really well and it certainly puts them to good use. We collect them very quickly with all the copying that goes on.
Pom Poms
You will need:
Pom poms
Printable
Tweezers / Tongs
The last activity for today has to include pom poms. I had to bring these up as I have waited patiently to find these. I know that back home (South Africa), these are super easy to find but I finally got hold of some and this is a snippet of what we get up to.
I found this Pom Pom Alphabet set online, created by the Measured Mom. If you’re new to teaching or have your little one at home, then you should swing by her site. She has a ton of resources available.
That’s all for today folks 🙂 I’d love to hear which activities you enjoy doing with your little ones.
Every single reader who lives on this beautiful planet once had to start at the very beginning. I’m assuming not everyone is born fluent in reading and writing. 😉
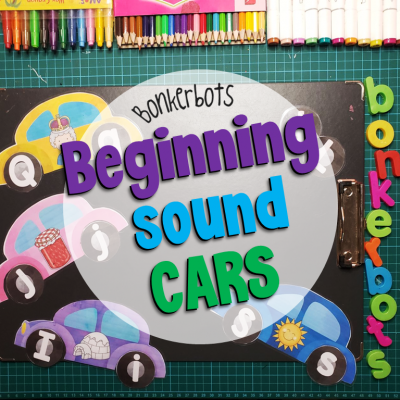
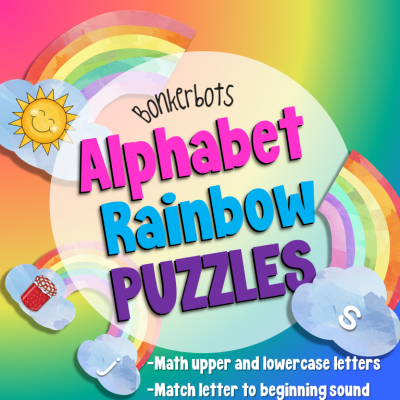
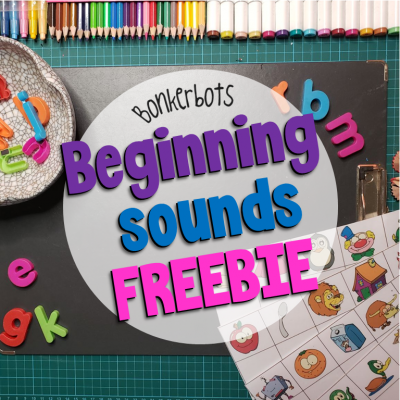
As Kindergarten teachers will know very well, before a child can begin the steps to reading, they must be familiar with the letters they are going to be using. We have a fabulous alphabet containing 26 uppercase and lowercase letters. So what now?
The next exciting challenge is to get the kiddies enthusiastic about learning these foreign letters … thank goodness we live in a time with social media. We can pop on over to Google and Pinterest and find thousands of ideas in a matter of seconds. It’s amazing but the search results can quickly become overwhelming. As a teacher (and a woman), I absolutely love Pinterest. I am constantly searching for new ideas for my School.
Today’s post shares a few of the ideas and products we use in our school to help our little ones familiarize themselves with the English Alphabet.
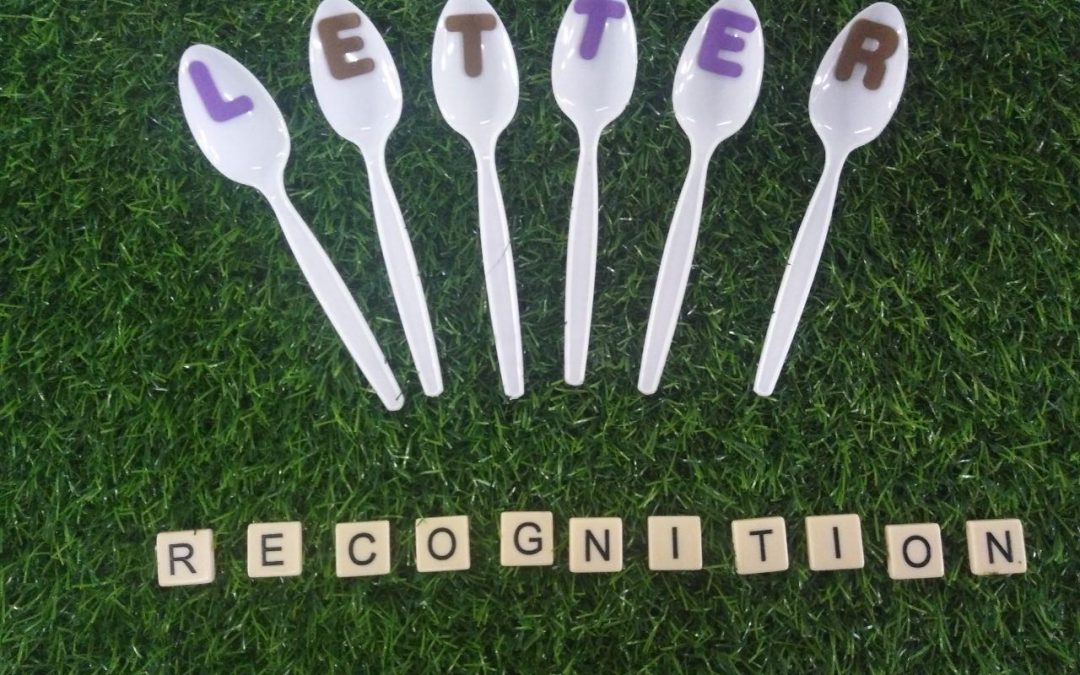
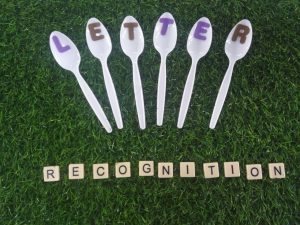
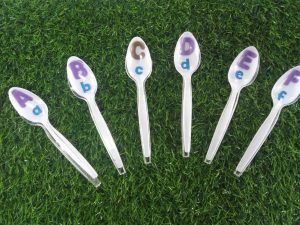
Spoon Match up
One of my favorite activities to do are these adorable Spoon Match ups. They were really easy to prep as you just need spoons (colored and clear) and alphabet stickers. Most book stores will have a variety of sticker options. I am super grateful that my little town in Cambodia now stocks plenty of stickers.
The colored spoons would be used for the uppercase letters and the clear spoons would be for lowercase. I didn’t do anything fancy other than stick them on. There was no need to modge podge them and I haven’t had a single issue with it either. The kiddies are instructed to not pull them off but they seem to have no desire in doing so.
These are a perfect addition for stations or for early finishers. They’re just so versatile and easy to whip out.
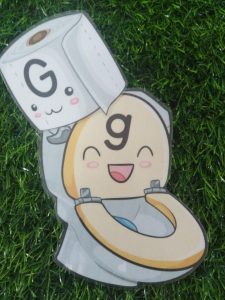
Loo match up
I thoroughly enjoy using these match up puzzles, mainly to see the kiddies reactions and of course, to practice. There’s a lot of shocked faces followed by laughter.
These puzzles can also be adapted to suit different levels. Students are able to match lowercase (toilet) to uppercase (toilet paper) and there are also logs, which contain beginning sounds. These are ideal for stations, group or independent work.
The biggest task would be printing, cutting and laminating. However, as a teacher, I think we are constantly creating resources and like I always say, “Once it’s laminated, it lasts forever.”
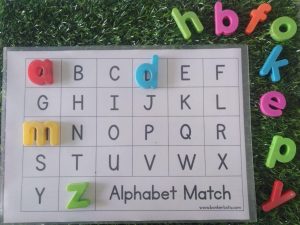
Magnetic match
You can never go wrong with magnetic letters. I remember how thrilled I was when I bought my very first set for teaching, way back when. My hubby looked at me like I was the weirdo but I remember being SOOO excited at all the possibilities these little letters could be used for.
This is a very easy activity to set up. All you need to do is print out this sheet, provide letters and VOILA, lotsa fun ahead. I LOVE observing the kiddies through this as they’re always super zoned but also very helpful towards their pals. So sweet!
Grab your FREE printable at the end of this post. 🙂
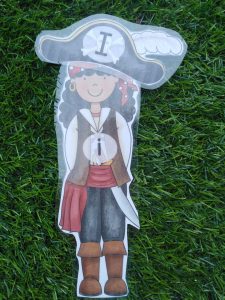
Pirate Match
Our last activity for today’s post is also one of my favorites. I really love how these turned out and it’s another great way to practice letter recognition.
Of course, it does require some more printing and laminating but hey…isn’t that what a hubby is for (haha). My kiddies have all enjoyed matching these up and they have also bring great for early finishers.
Wow! This is rather exciting. Bonerbots very first blog post. Where shall I start?
I think the very beginning would be best. Bonkerbots is made up of my oh so handsome fiance, Keith and then, me. We are South Africans expats living in Cambodia. CAMBODIA you say, how did you land up there? Excellent question. Keith and I met many moons ago at our previous jobs, working as hairstylists. We saved up some moola and went backpacking in Thailand for 2 months. We immediately fell in love with it and felt we had to come back and live there. I think everyone who has been to the islands feels the same way. So we saved up, quit our jobs and headed to Bangkok to begin our TEFL course.
We completed our TEFL course through Chichester Collage .Once the month was up, we started teaching at a school in Bangkok. I knew from the very beginning that I wanted to teach Kindergarten, whereas Keith taught Primary school. We landed up working for a year and started to get tired of the massive city and felt we needed a change. And that’s how Cambodia happened. Our boss at the time happened to run a school in Siem Reap and that’s where we have been living for the last 3 years.
Siem Reap is a fantastic ‘little’ town. One of the main things that I absolutely love about this place, is being able to ride on my bicycle around town and that it takes 5 mins to get anywhere. Now you know who we are and how we landed up here, but how exactly did Bonkerbots form? Well, it all started with the frustration of not being able to find exactly what we wanted online, in terms of resources. Or, if we did, it was often at times, rather expensive. Keith then began drawing different resources for me. It started with a split pin craft and then we began to make flash cards and mini books. Once we discovered teacherspayteachers, we felt we could bring something fresh to the table and we have loved every minute since.
So welcome to our blog. We look forward to sharing our classroom ideas with you all.